We’re not even twelve months into our KNX journey, but we already have devices from over ten manufacturers of KNX gear all happily coexisting throughout the house.
One of the first decisions we had to make was the choice of light switches. We had a few criteria, the main one being that the switches needed to fit within a standard Australian mounting plate, as our installation was a retrofit. Given the house has plaster walls we could have patched all the rectangular holes, re-painted and gone with Euro-style switches in their square mounts, but we decided that was a bridge too far – at least initially.
We also wanted distinct buttons, so that invalidated some of the touch-based models with their ‘secret’ hot-spots.
Those sorts of things are perhaps fine if you’re the only people who’ll ever touch them, but of course reality introduces guests, cat-sitters, cleaners and tradies, and none of those want to sit through a site induction training course before you’ll let them go to the bathroom.
The other requirement for distinct buttons – what we’re calling a ‘tactile’ experience – is the way we reach around the door jam for the switch on the way into the room.
Tactile switches let you locate and operate the ‘on’ button by feel with barely the need to slow your pace. This is as critical for us as the mounting plate, if not more so.
I also have a personal dislike for rocker-style switches that operate horizontally. Left for down and right for up just doesn’t work for me. So they’re out. For the time being.
Some History
In our old place we had C-Bus home automation. The basic 2000-style switches served us well and met the above criteria:
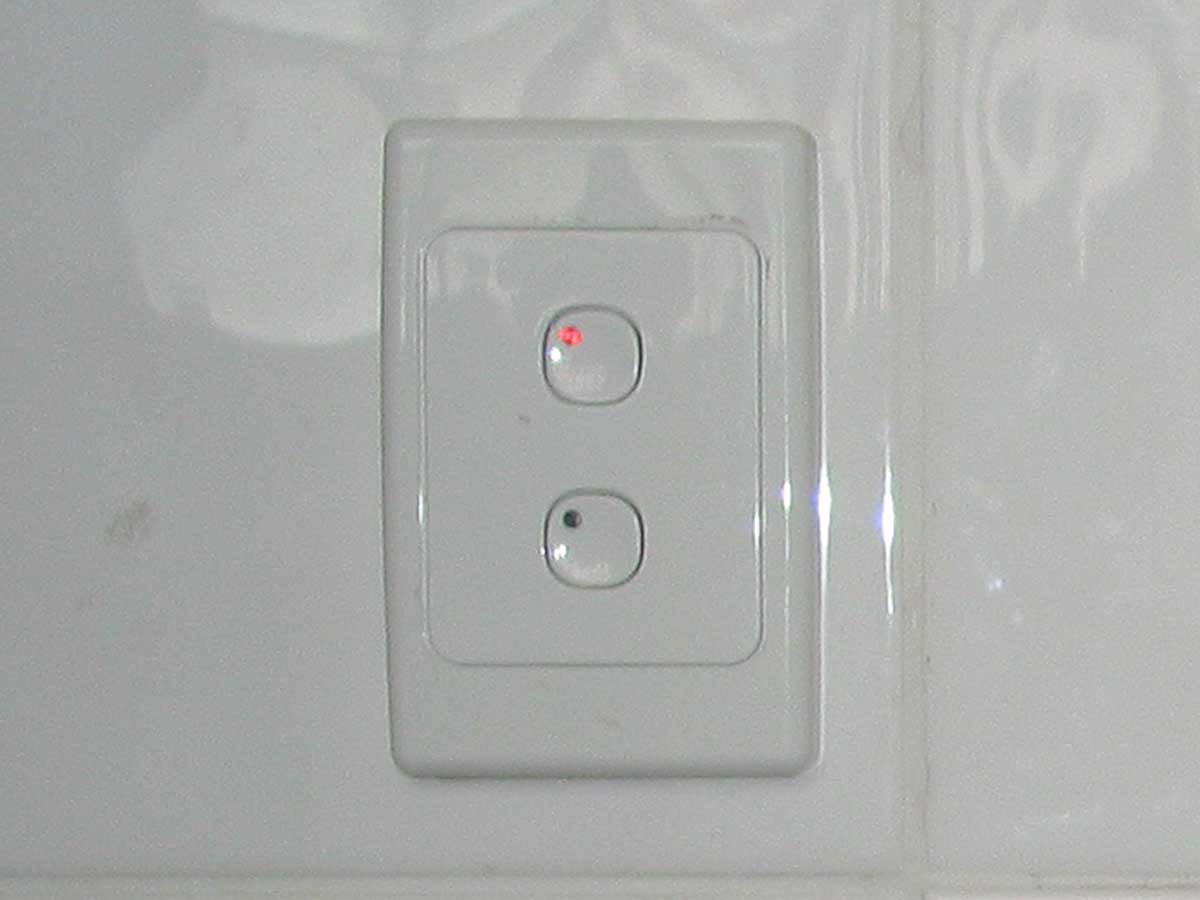
These were easy to find by feel, and you never accidentally operated the wrong button.
We got away with these for ages, because most of the places a guest was going to go they only had two buttons from which to choose, arranged one on top of the other. I went one further: with the exception of the bedroom (for I hope obvious reasons) I had the top (‘on’) LED permanently lit, with the bottom one following the channel’s status. The end result was that an ‘active’ button – one you might have a reason to press – had its LED lit as a visual prompt to press it.
In the bathroom I also limited the minimum intensity of the channel, so that if someone gave the ‘on’ button a press of just the wrong duration – long enough for it to think they wanted to dim up from ‘off’, but not long enough to reach a level at which the filament glowed – the light at least came up to a passable level.
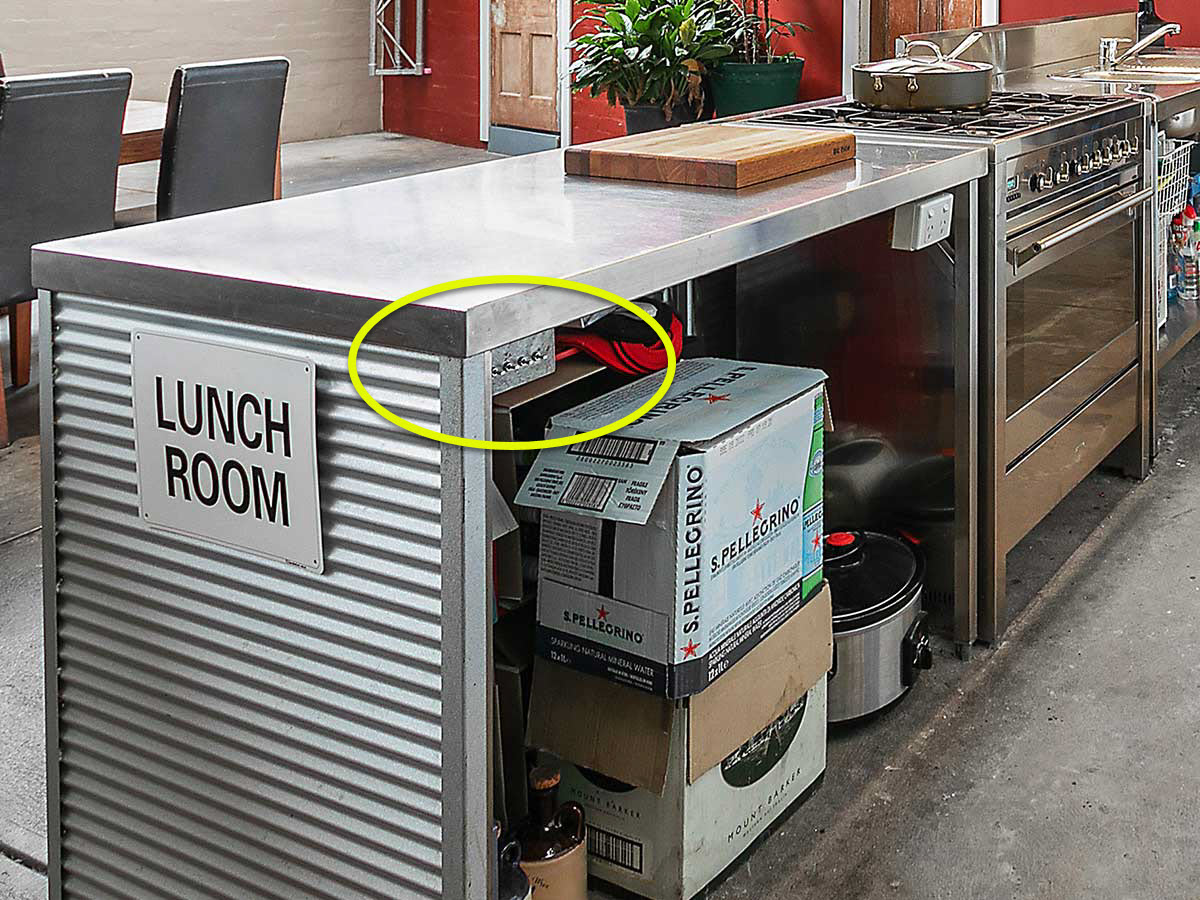
The flexibility of C-Bus allowed us to do some tricky stuff to, including one light switch consisting of a joystick from an amusement machine, mounted in an aluminium plate, whilst this one – a butchered 8-way Neo switch in a diecast aluminium box with 4 centre-off momentary toggle switches was hidden under the kitchen bench:
We can still do all this with KNX, however those are the exceptions. We need a standardised switch that’s simple and easy to operate, that won’t intimidate guests.
Hager “Silhouette”
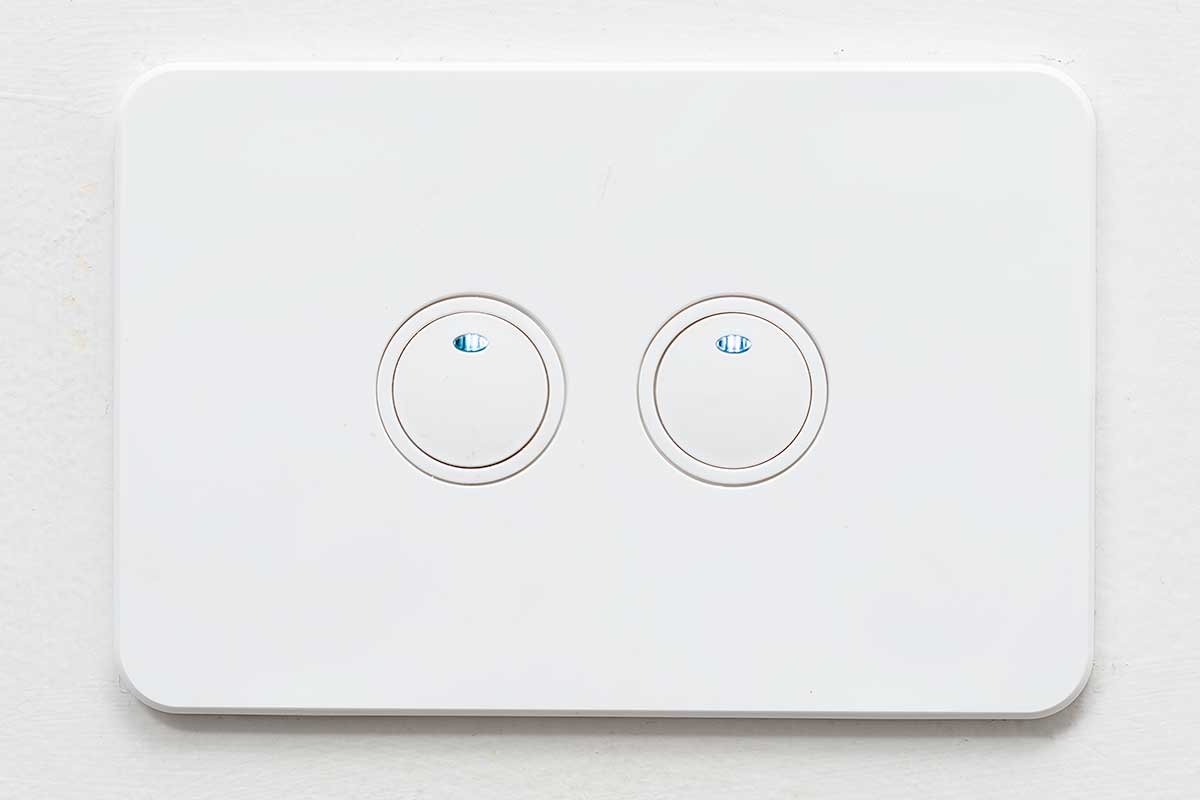
Thankfully the Hager “Silhouette” series filled the hole – both literally and metaphorically. The horizontal mounting deprives us of the natural up/down of a vertical plate, and that’s something we’ll address in the longer term. If the Hagers stay, we’ll do the patching to re-orient them vertically. Thankfully the round buttons clip into the plate, allowing us to rotate them through 90° so the LED will remain upright.
An overarching requirement in EVERYTHING here is that it has to be guest friendly. Our initial solution to that problem in the bathroom isn’t the most pretty:
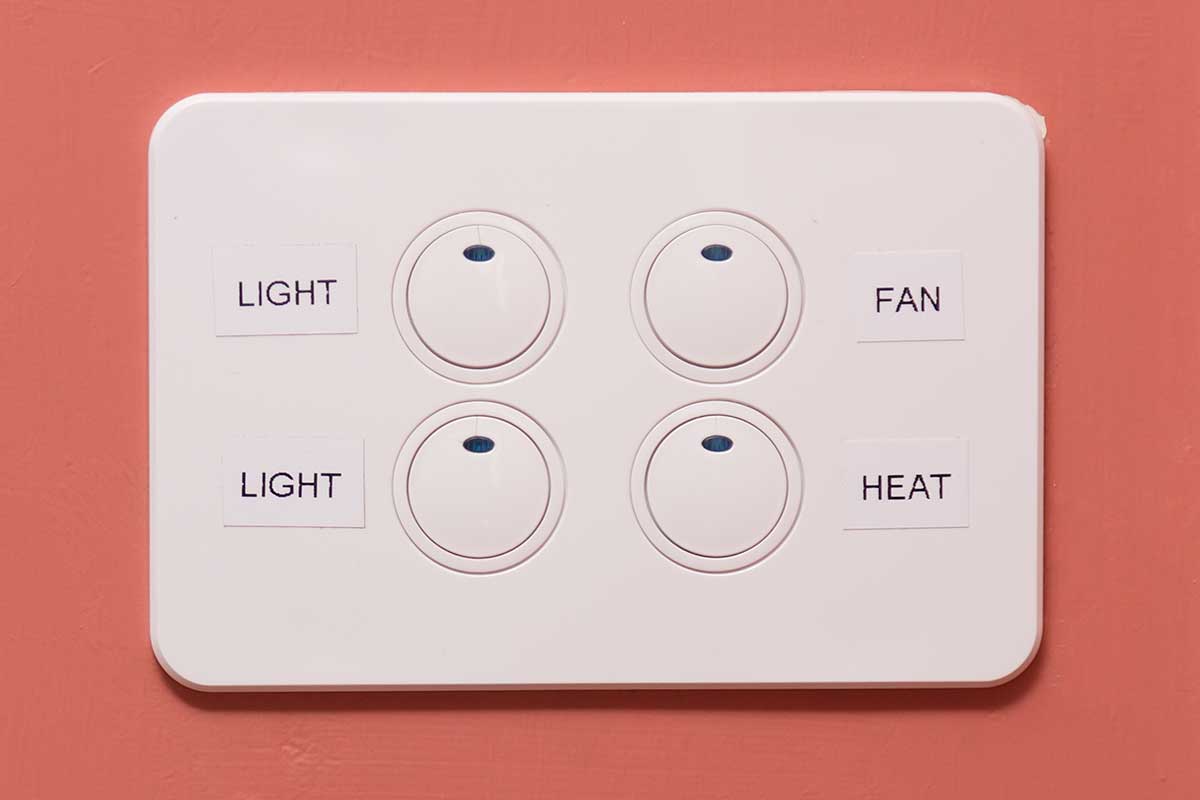
The two buttons on the left are a vertical up/down pairing for the light, whilst the two on the right are toggles, and both of those also have a degree of automation applied to them.
If we stick with the Hagers long-term, I can only see two ways to resolve this ugliness: 3D print a replacement surround that has nice labels embossed in it, or perhaps route or laser-etch labels into the originals (and allow for some spoilage in the process).
“Wall acne”
As our home automation has grown, so have some of the requirements and that’s started to present a challenge. Since moving in we’ve added ceiling fans and motorised blinds to key rooms, and with those extra devices comes the need to control them.
That’s contributed to the nasty wall acne, but we’re actively working on reducing it.

One potential approach to rid ourselves of this nasty mess in the upstairs rumpus room is a flush-mounted tablet, consolidating light, fan, blind and aircon controls into the one discreet surface.
But a tablet for every room isn’t going to cut it, and of course a sheet of glass is the antithesis of tactile.
Where to now?
I’m on the lookout for new switches that meet our growing requirements:
- Fit an Aussie mounting plate.
- ‘Tactile’ – you can locate the ‘on’ button by feel.
- Has some inherent labelling capability, e.g. digitally (a display), removable keycaps, etc.
- Preferably not cost the earth (if I’m going to replace all nine upstairs light switches).
I’m interviewing a possible candidate now…
I thought the Zennio Tecla might have been The One, but it didn’t quite hit the mark. Check out my review.
Revision History
9th February 2023: this is the initial publication.
17th June 2023: added the Tecla review link.
– G.


Any update on this?
Hi Barron,
I’ve just updated the post to add the link to my review of the Zennio Tecla, which unfortunately whilst close, failed to hit the mark.
I await more offerings.
Do you share my sentiments/criteria?