| TL;DR: Part 2: add an On-premises Data Gateway & trigger a “UI Flow” via a web hook, initiated by a “flic” smart button. |
In my last post I demonstrated how you can use the new “UI Automation” functionality inside Power Automate (pka Microsoft Flow) to fill out a web form. In that example I automated a report of a shopping trolley abandoned out the front of home.
This post adds the trigger control. Here I’ll take you through adding the required “on-premises data gateway” and add a web-hook to fire the flow, triggered by one of our “flic” smart buttons. With one of these located near the door we’ll be able to lazily submit a trolley report just by tapping it when we arrive home.
UI Flows
Pre-req’s / Do Not Pass Go!
In what I can only hope is a “v1” limitation, a UI flow requires an “on-premises data gateway” – a machine on which to run. The machine needs to be joined to Active Directory, be that an on-premises Active Directory (AD) or Azure Active Directory (AAD).
This machine must be a 64-bit version of Windows 8 or a 64-bit version of Windows Server 2012 R2 or later, and requires .NET Framework 4.7.2. There are more pre-req’s in the References at the bottom of the post.
In this example I’ll be installing the on-premises data gateway on a new virtual Windows 10 machine, attached to my on-prem AD.
TRAP: When setting up the trigger in Power Automate, you’re required to save the AD credentials of the AD account that was used to install the Gateway. You may want to consider creating a new ‘service account’ for this before proceeding.
Install the On-Premises Data Gateway
- Login to the machine you’ll be using as the on-premises data gateway. I’m already tired of typing that, so hereon it will be “OPDG”.
- Download and run the OPDG installer “GatewayInstall.exe”.
- Accept the UAC popup if you’re prompted.
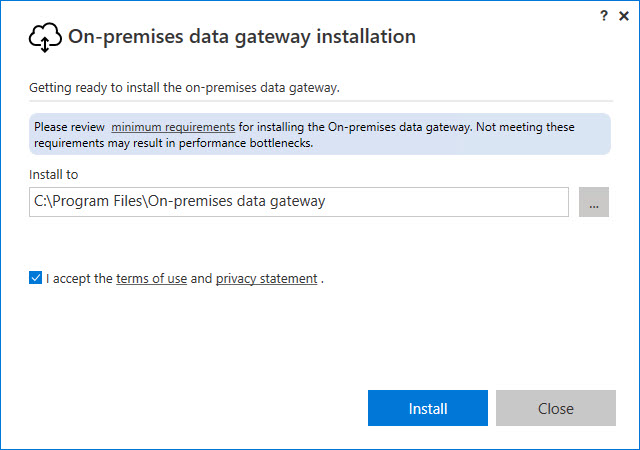
- Check the “terms of use” box and click Install:

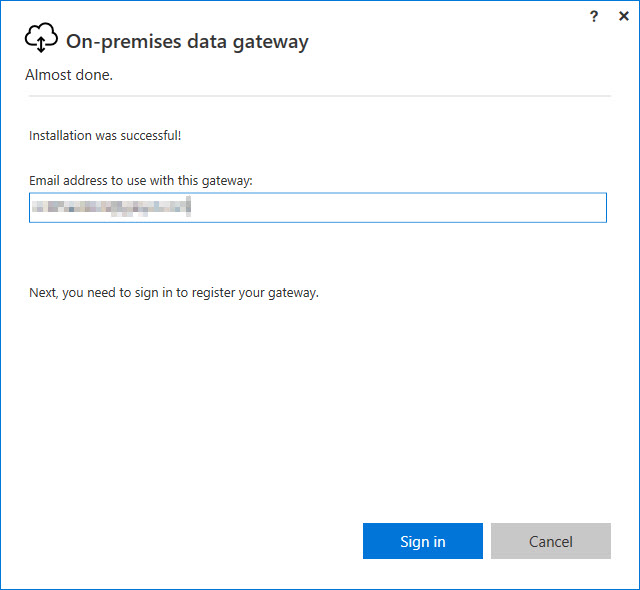
- On the “Almost done” dialogbox, enter the e-mail address you used to create the UI Flow and click “Sign in”:

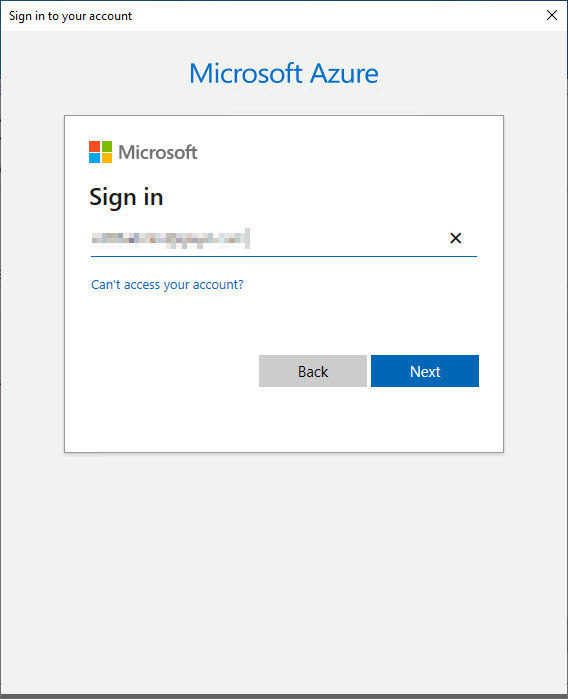
- Sign in to Azure:

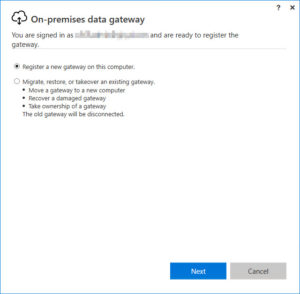
- Leave “Register a new gateway on this computer” selected and click Next:
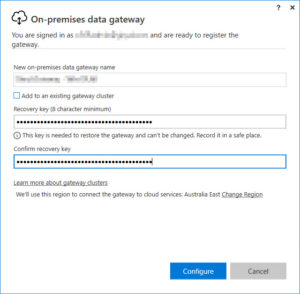
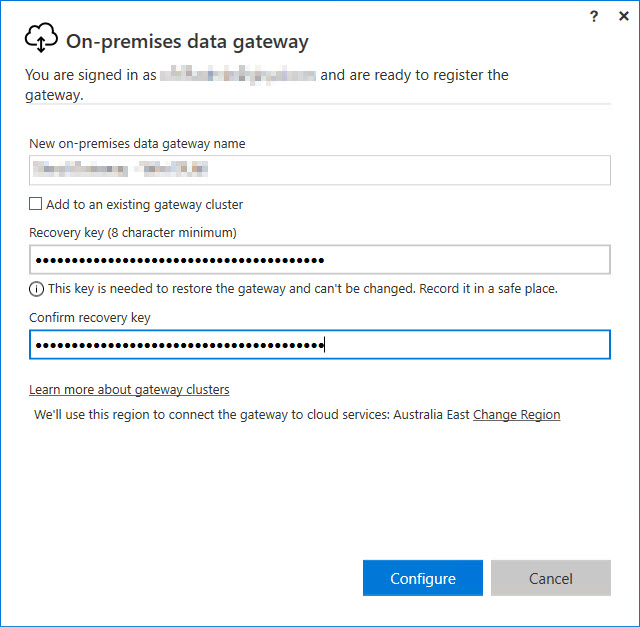
- Provide a name for your OPDG, set a recovery key and click Configure:
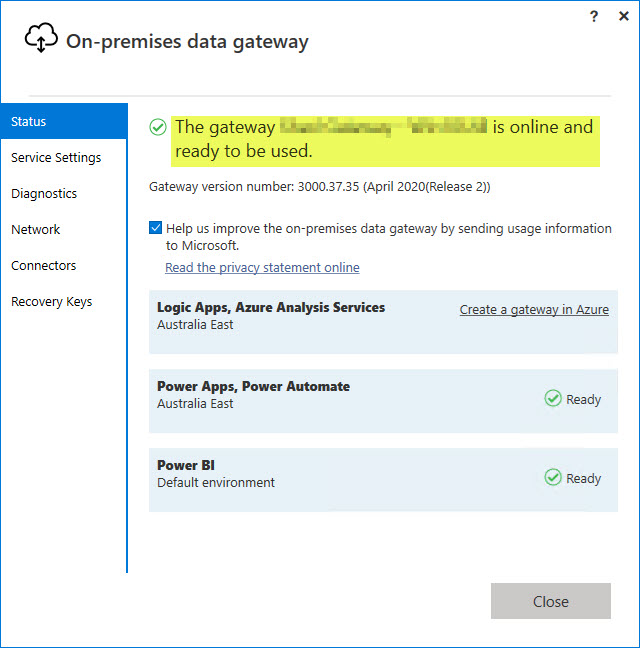
- Hopefully your gateway will be “online and ready to be used”:

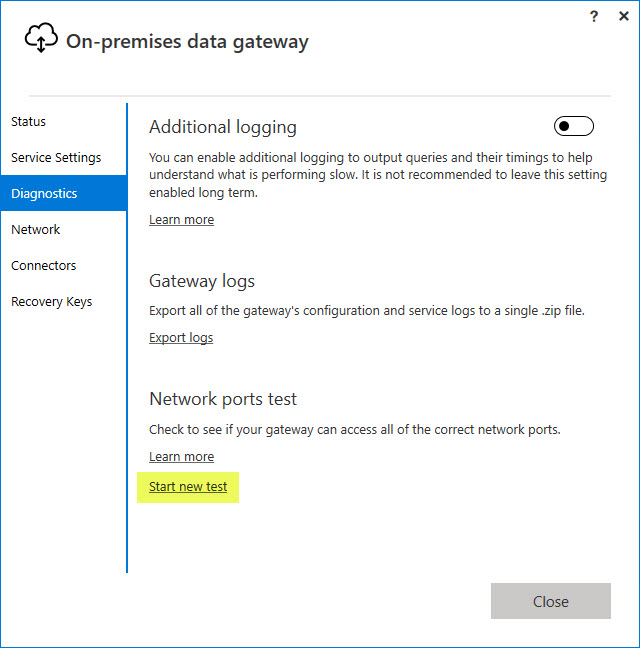
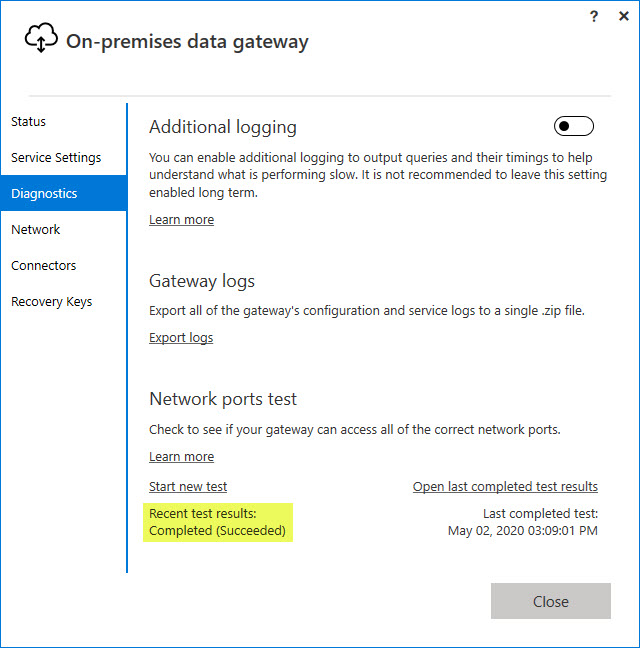
- Browse through the tabs down the left hand side. Stop at “Diagnostics”.
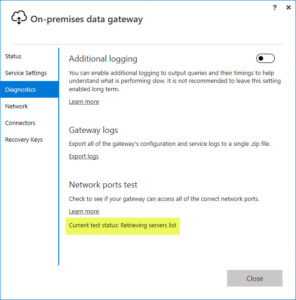
- Under “Network ports test”, click “Start new test”:

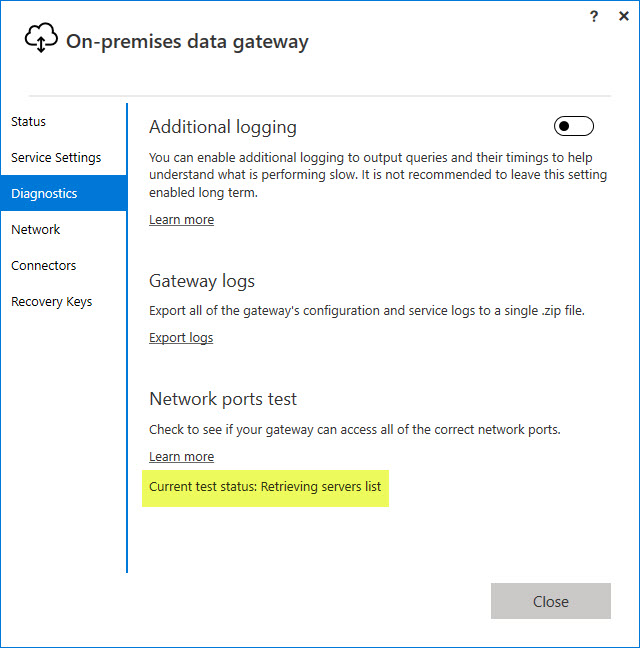
- The test will commence with “Retrieving servers list”:
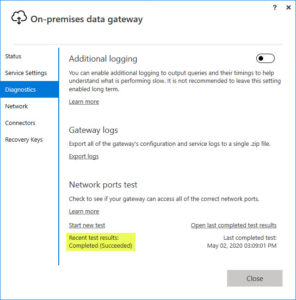
- … and should shortly indicate success:
- If your test failed, it might be because it needs to navigate a web proxy to gain internet access. See the References later in this post for a link to the relevant page for that.
- Click “Close” to exit the installer.
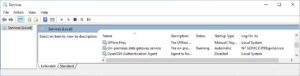
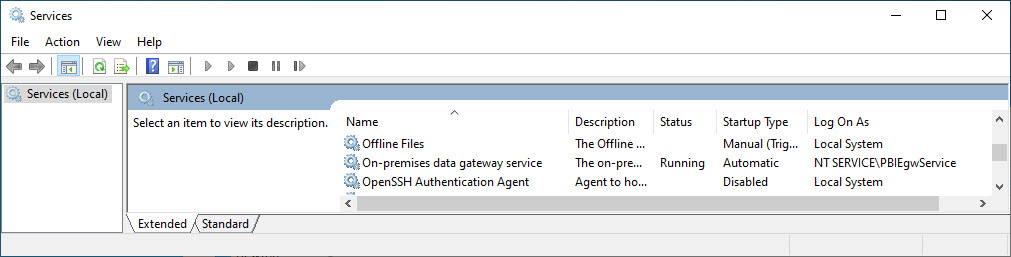
- If you open services.msc, you’ll see the OPDG has installed itself as a service, run by its new account “NT SERVICE\PBIEgwService”:
- The OPDG will only run if no-one is logged in to the machine, so log out for now.
- Mission accomplished!

Run attended and unattended UI flows
OK, let’s setup the web hook/trigger that we’ll use to fire the Flow.
- Browse to flow.microsoft.com and sign in to Power Automate.
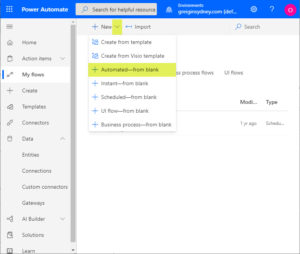
- Select “My flows”, then from the pulldown next to “+ New”, choose “Automated – from blank”:
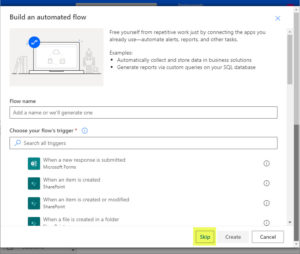
- On “Build an automated flow”, click “Skip”:
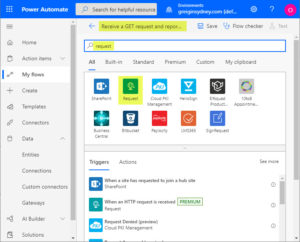
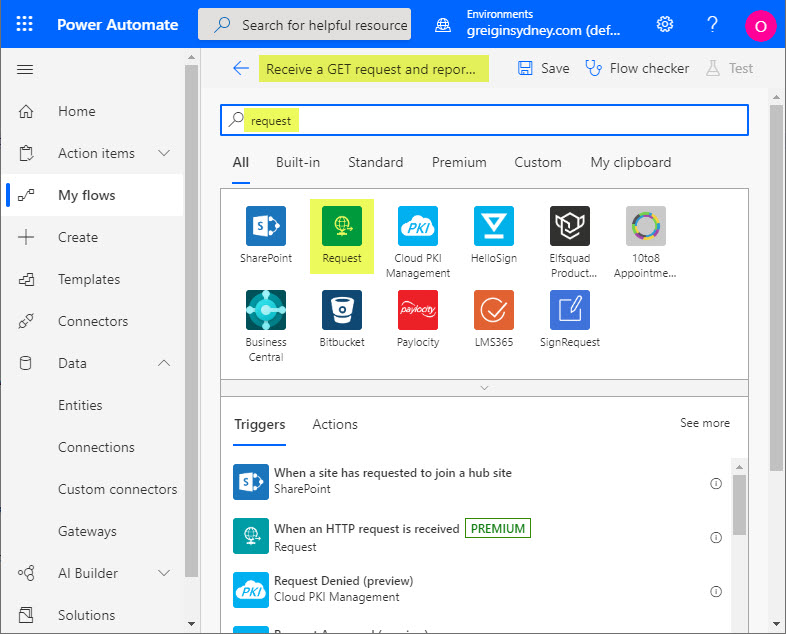
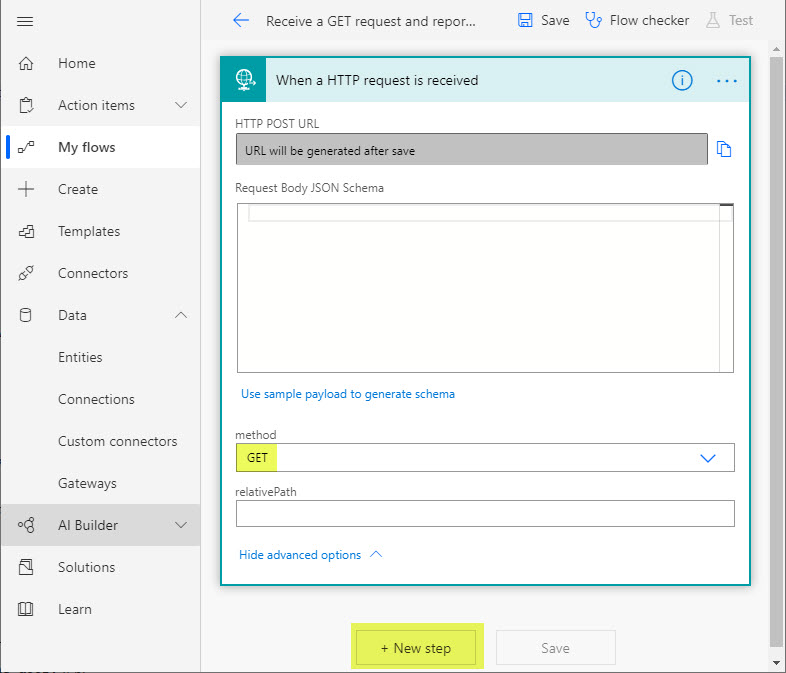
- Give your flow a name, type “request” into the search bar, and then click on the Request trigger icon when it displays:
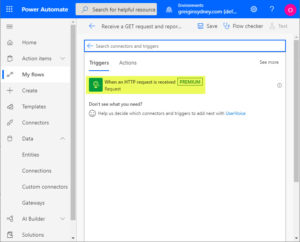
- Click again on the “Request” trigger:
- Click “Show advanced options”:
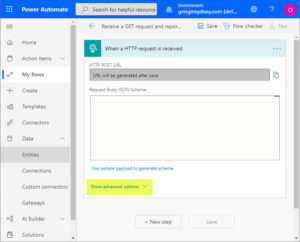
- Change the method to GET, and then click “+ New step”:

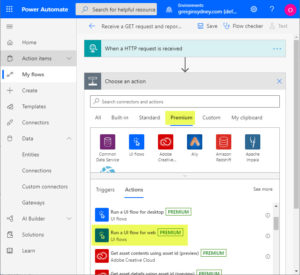
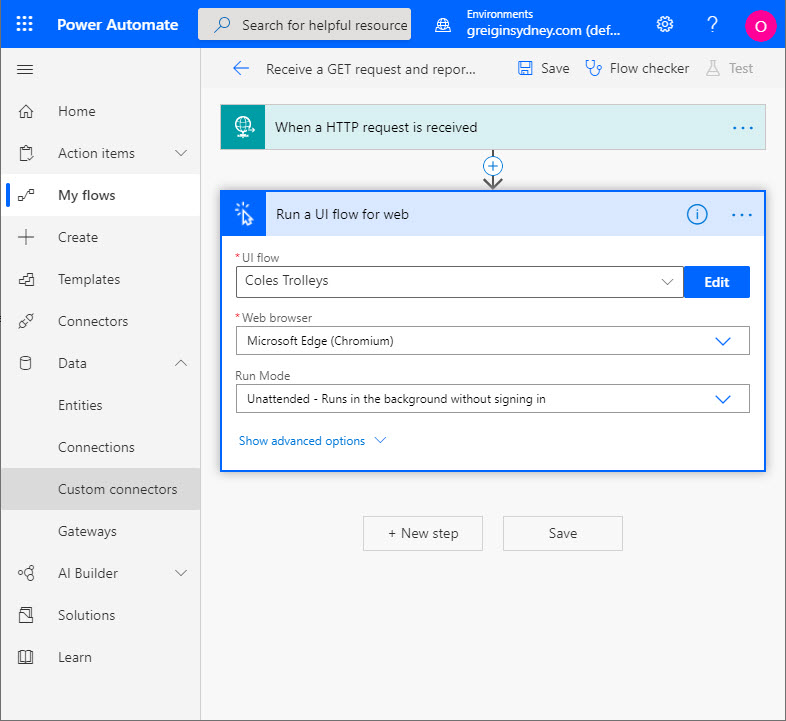
- Under “Choose an action”, click the “Premium” tab, then scroll to and select “Run a UI flow for web”:
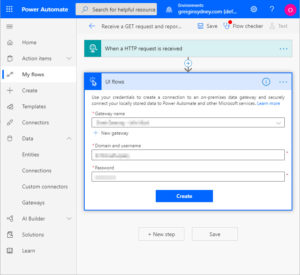
- Under “UI flows”, select your Gateway from the pulldown list (if it’s not already populated for you), provide the AD credentials of the user who installed the OPDG and click “Create”:
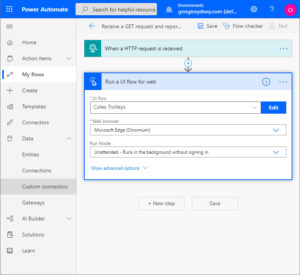
- Under “Run a UI flow for web”, select the UI flow, choose your browser, set the run mode to “Unattended” and click “Save”:
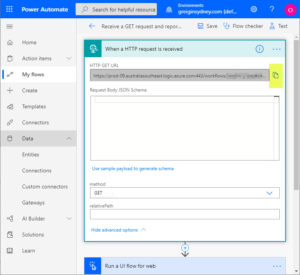
- Scroll back up (if necessary) and click on “When a HTTP request is received”. (This is required because the link we need isn’t created until the Flow is saved.)
- Click the copy icon next to the HTTP GET URL, and paste the link where you’ll be able to retrieve it later. This is the URL that the flic button will call:
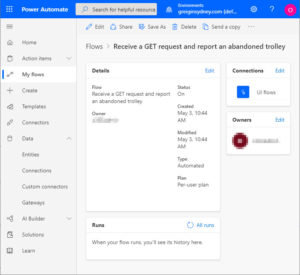
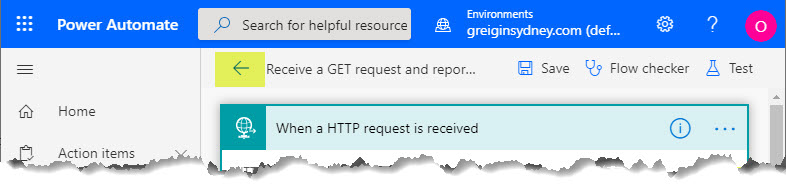
- Click the Back arrow to the left of the title at the top of the page. Disregard the warning if you’re prompted about losing changes – you saved the setup in Step 28:
- The summary page should report your success:
- Open a fresh browser tab, paste the URL you saved in Step 30 and hit return.
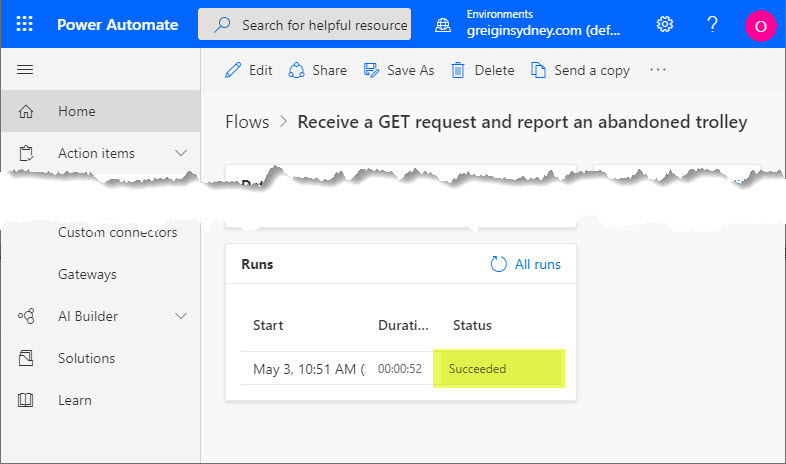
- Return to Power Automate and click the Refresh icon in the “Runs” box. Your web request should have been received, and the Flow will show as running:
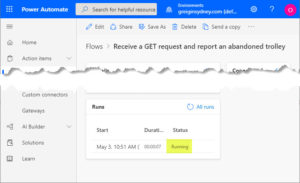
- Keep hitting Refresh until you have a result. Hopefully it’s the right one:
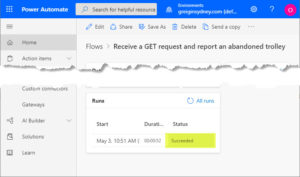
- Assuming the result is “Succeeded”, and if the output of the web form is visible to you, confirm the form was submitted as expected.
- If the result is a failure, double-check no-one’s logged into the OPDG and that you set the correct user credentials in Step 27. You’re sure the network test in Step 11 passed without needing to add proxy settings?


Call the web hook from a flic button
The final piece of this puzzle involves triggering the flow by pressing a bluetooth button, a “flic” smart button.
(Yes, you could alternatively use a “Flow button for mobile” trigger and fire the Flow from the Power Automate app on your phone.)
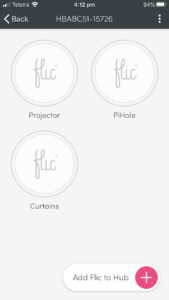
In this walk-through I’ll add a new flic to our existing setup.
- Launch the flic app on your phone & connect to the Hub (if you’re using one).
- Tap “Add Flic to Hub”:
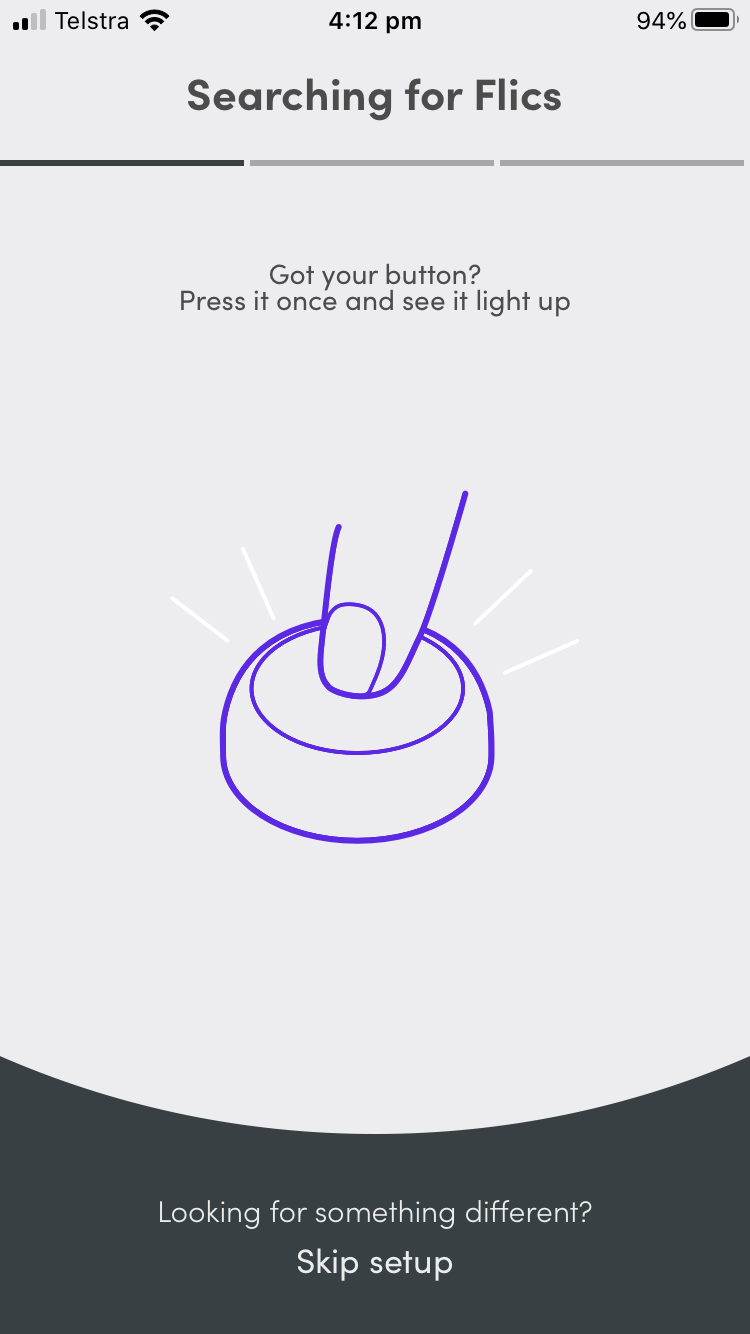
- When you see “Searching for Flics”, press the button on your new flic:

- When you see “Pairing complete!”, tap “Finish”:

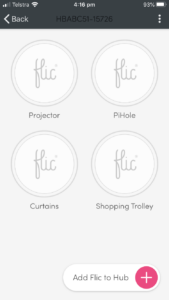
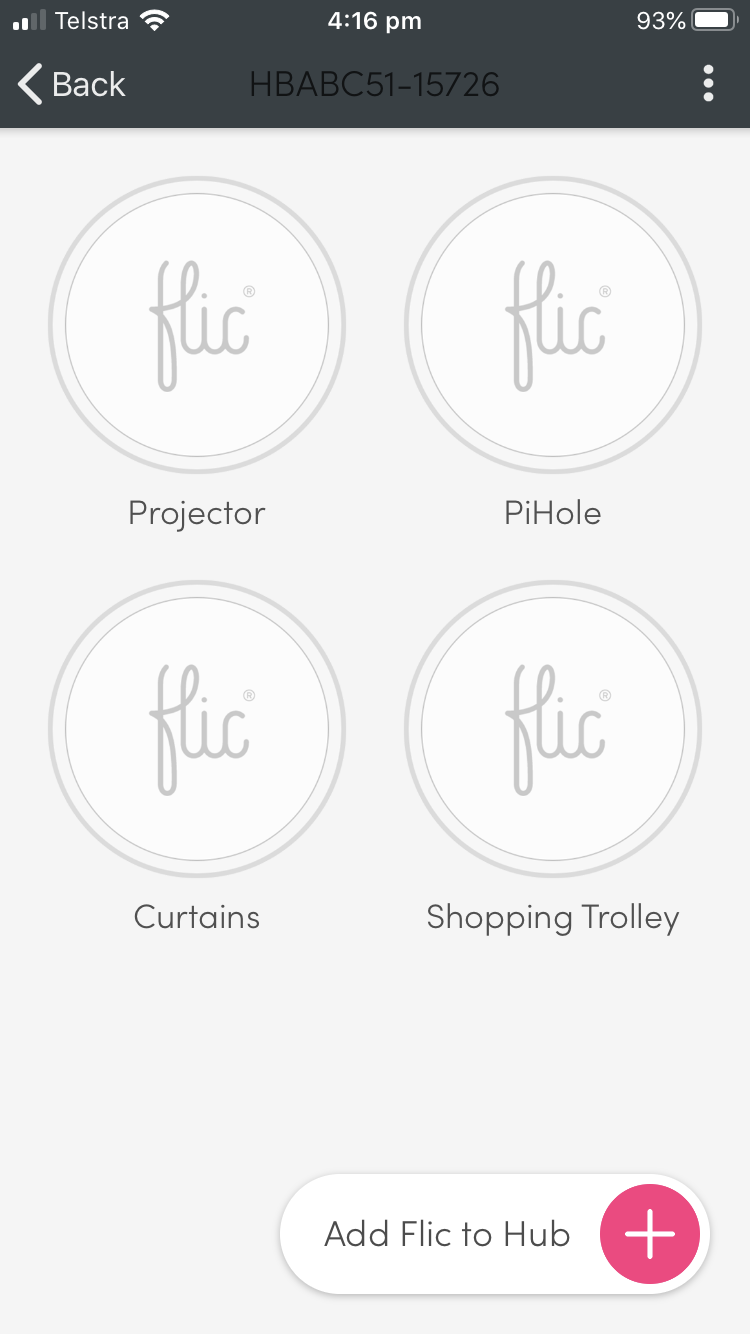
- You should be returned to the pain page. Tap the new flic icon, which will have appeared as “My Flic”:
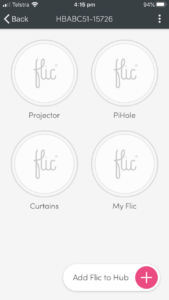
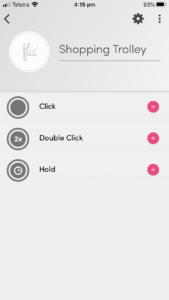
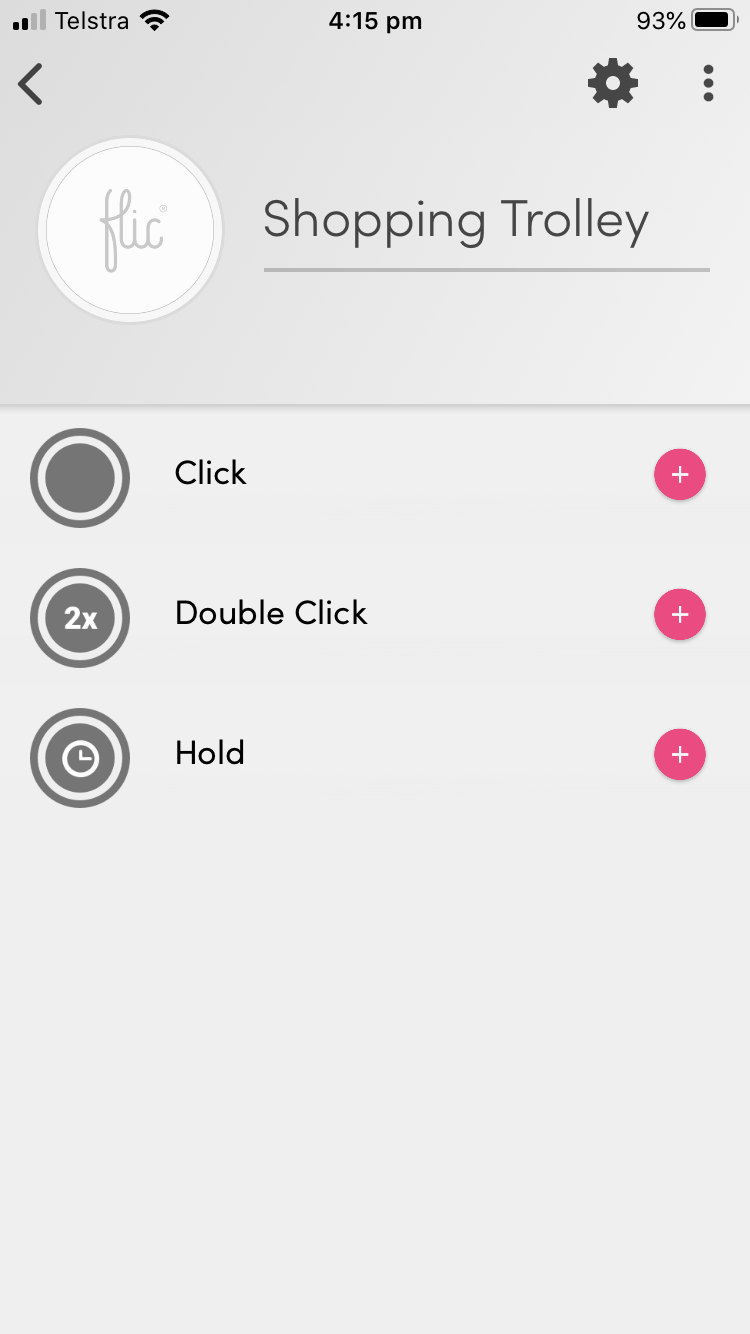
- Rename it to something appropriate, then click the “+” to the right of the “Click” action:
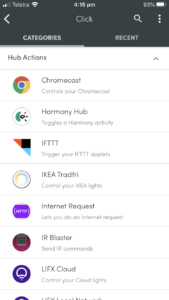
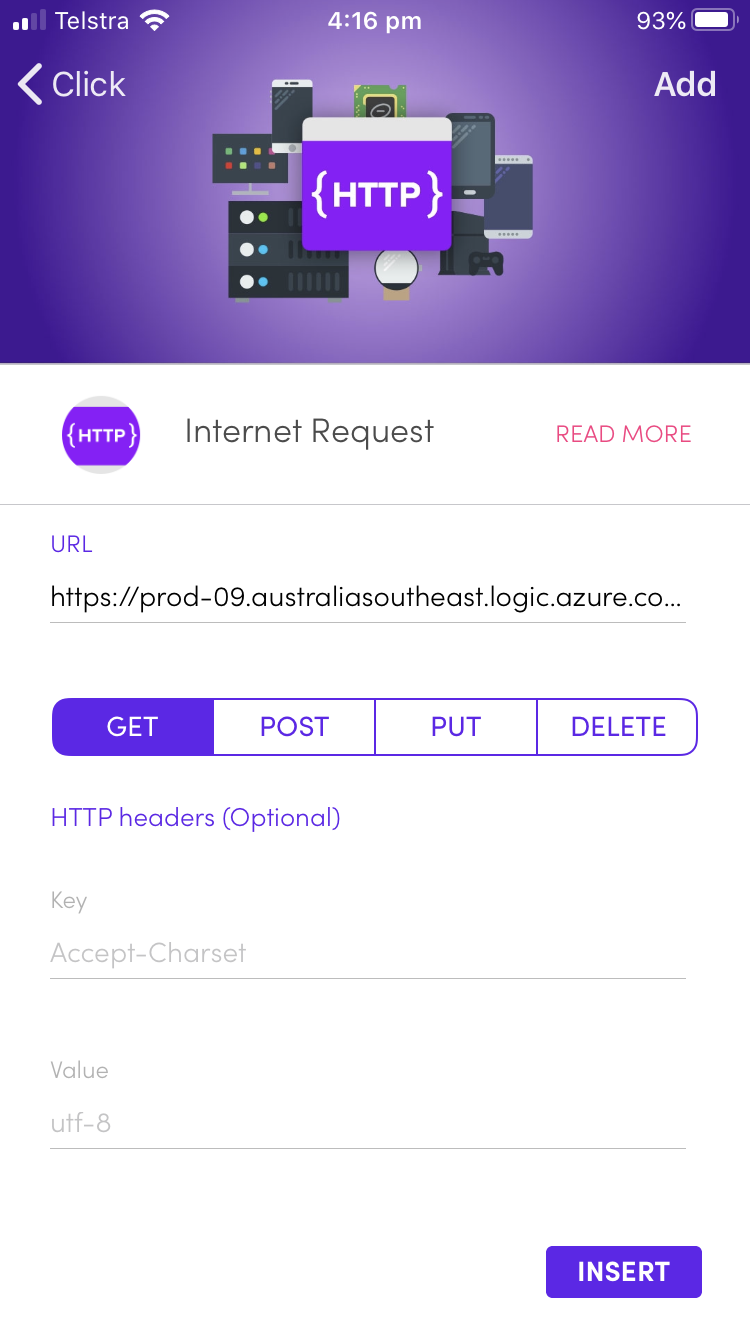
- From the list of Hub Actions / Categories, select “Internet Request”:
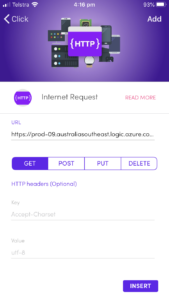
- Paste the URL, leave the method as GET and tap “Add”:
- You’ll be returned to the button’s summary screen. Tab the back-arrow:

- The main screen confirms we’re done, and your new button is ready to go!


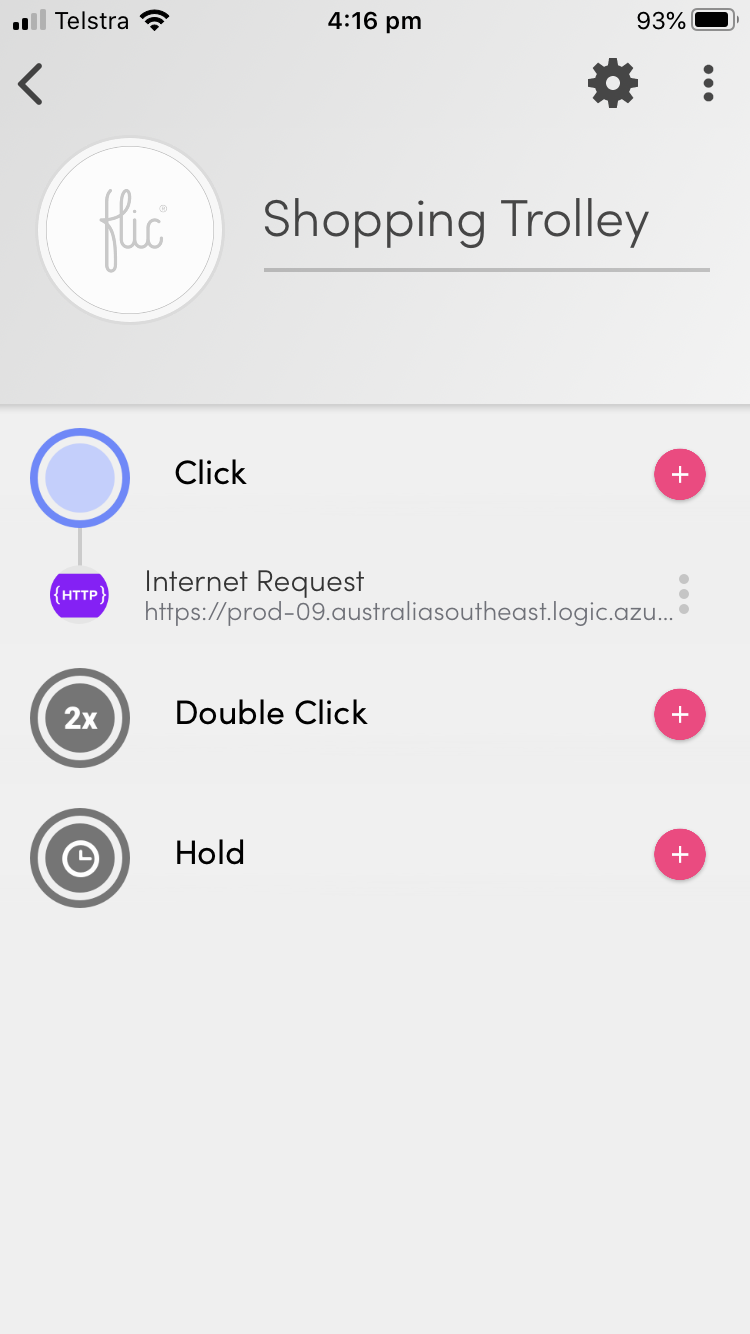
With one of these located near the door I’ll be able to submit a trolley report just by tapping it as I walk inside.

Limitations
- The On-premises data gateway machine needs to be powered but not have anyone logged in. This essentially requires this machine to be dedicated to this role.
- As referenced earlier, when setting up the trigger in Power Automate, you’re required to save the AD credentials of the AD account that was used to install the Gateway. Choose a different account at this stage and your flows will fail every time. The fix, if you’ve joined me in making that mistake, is to login to Power Automate and update the stored credentials at Data / Connections / Select the Gateway / Edit.
References
- On-premises data gateway machine requirements.
- Run attended and unattended UI flows.
- Install an on-premises data gateway.
- Configure proxy settings for the on-premises data gateway.
- “flic” smart buttons.
Revision History
3rd May 2020: this is the initial publication.
– G.


