I’ve been tinkering with Python of late – of which you’ll read more about here in due course. I’ve never used Python before, but I’ve been really impressed with what I’ve been able to code and get a Raspberry Pi to do in such a relatively short time.
In the process of building that project I decided it would be handy if I could host a basic Python site in Azure, and I was pleased to see Microsoft has just the thing in preview at the moment. For bonus points, the base image deployed in Azure includes the Flask web framework, and the web app runs on Gunicorn, neatly paralleling my own development work and allowing for a very easy port to Azure!
My requirements didn’t fit with the automated GitHub deployment process that Microsoft documents, and I thought I’d reproduce it here for anyone else in a similar situation.
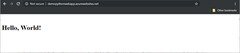
Our end result here is the customary “Hello World” page.
Pre-Req’s
This how-to assumes you have an Azure subscription ready to roll, hopefully a working Python site to copy across, and an FTP client like WinSCP.
Python’s still in Preview at the time of writing, but I’m pleased to say since embarking on this journey, Microsoft has increased the range of Python versions supported to now include 2.7, 3.6 & 3.7.
How-To
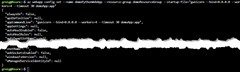
In this demo I’m creating all new entities in Azure, and I’m doing so using the Azure Shell. I wanted to use PowerShell, however the Linux commands aren’t all available in Azure PS just yet – so Shell it is. (Reference).
- Sign in to Azure at https://portal.azure.com:
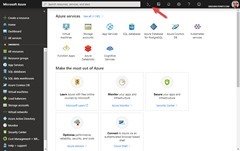
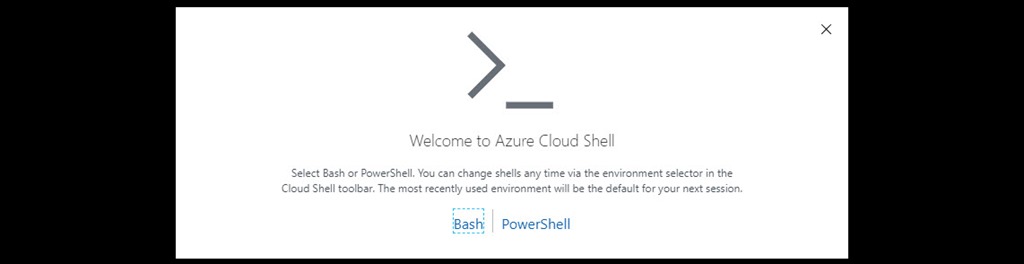
- Click the chevron icon in the title bar (highlighted above) to launch a Shell session and choose Bash:

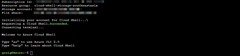
- If you’ve never done this before you’ll be prompted to create a new storage account. Choose as appropriate and click “Create storage”:

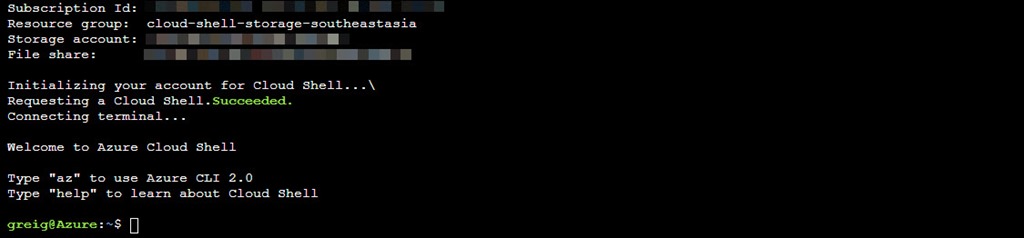
- You should end up at a blank shell window:
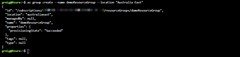
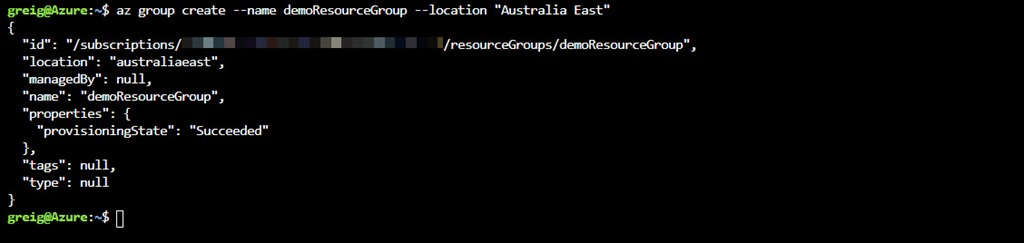
- If you’re going to use an existing Azure resource group, you can skip this step. Here I’ve created a new one called “demoResourceGroup”, and I’ve gone with my local Sydney location:
az group create --name demoResourceGroup --location "Australia East"
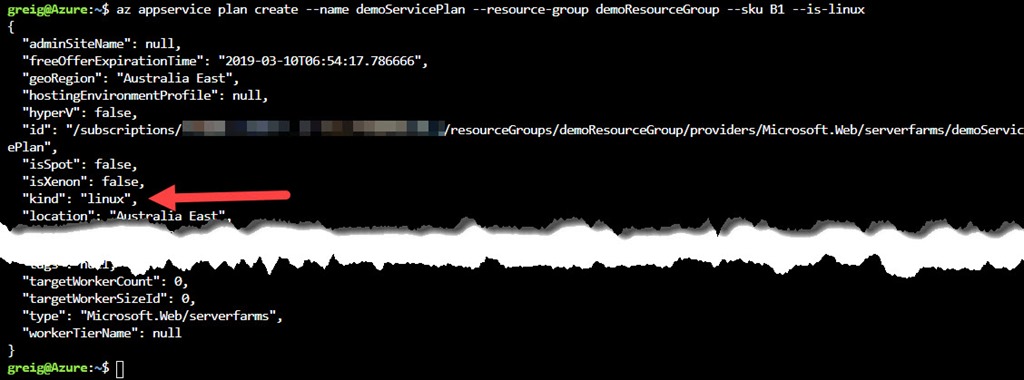
- If you’re going to use an existing Azure service plan, you can skip this step. Here I’ve created a new one called “demoServicePlan”, at the “B1” basic pricing plan:
az appservice plan create --name demoServicePlan --resource-group demoResourceGroup --sku B1 --is-linux
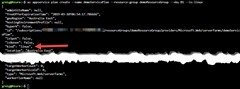
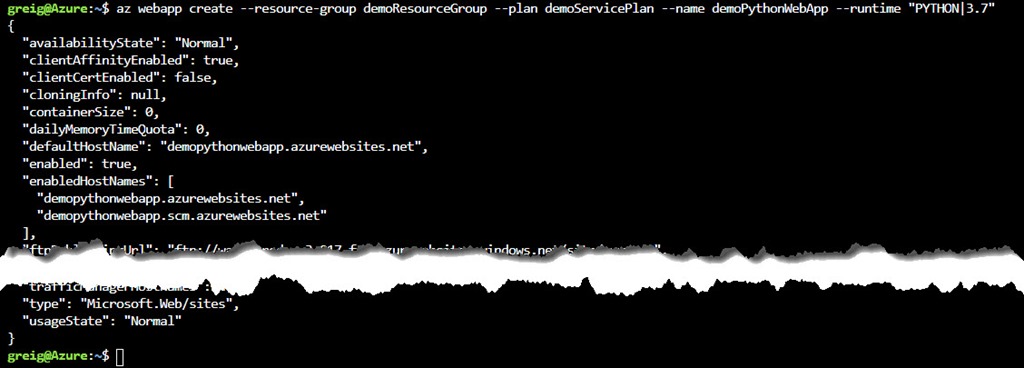
(It’s the “kind”:”linux” highlighted above that we can’t currently create using PowerShell.) - Now create the WebApp. Here I’ve created one called “demoPythonWebApp”, finally tying together all the resources above. Don’t forget to change the last parameter to be your desired Python version:
az webapp create --resource-group demoResourceGroup --plan demoServicePlan --name demoPythonWebApp --runtime "PYTHON|3.7"
- At this stage you should have a working website up and running. Of sorts anyway. Point your browser towards https://demopythonwebapp.azurewebsites.net and you should hit a generic landing page:

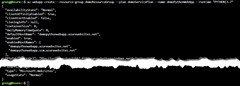
- Now we need to add some content! Before you can do that you’ll need a Deployment user account. If you don’t already have one, here’s all you need to create one:
az webapp deployment user set --user-name <username> --password <password>
The name needs to be unique within Azure, and the password must be at least eight characters long, with two of the following three elements: letters, numbers, symbols.
You should receive a JSON blob in response, with the password shown as
null. If you get a'Conflict'. Details: 409error, change the username. If you get a'Bad Request'. Details: 400error, use a stronger password.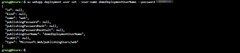
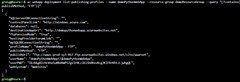
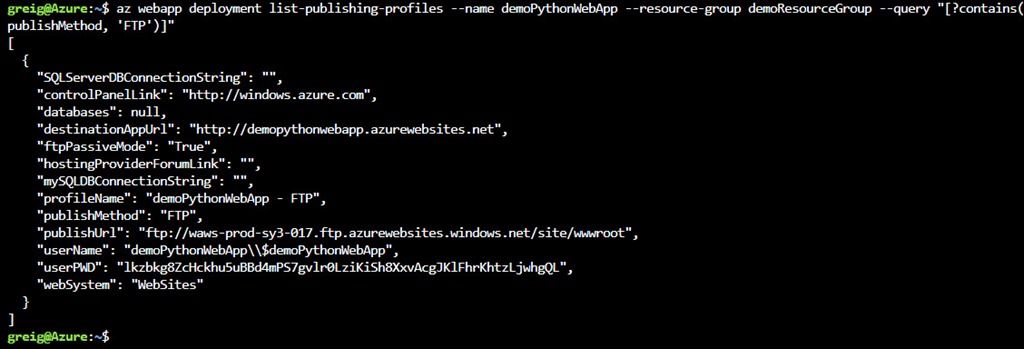
- The final piece is the deployment site to connect to. This is exposed in the Azure portal if you browse to the App’s “Overview” page, and it was output earlier, but it’s just as easy to find it via the Shell:
az webapp deployment list-publishing-profiles --name demoPythonWebApp --resource-group demoResourceGroup --query "[?contains(publishMethod, 'FTP')]"
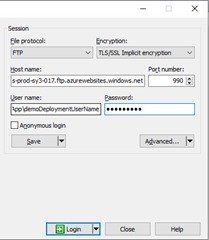
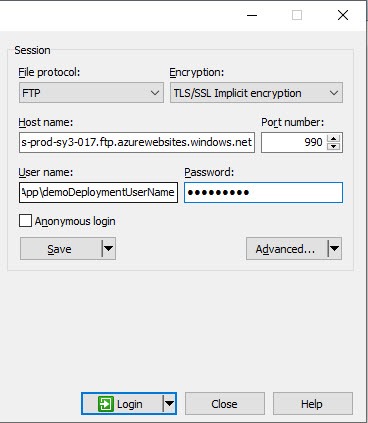
- Create a new site in WinSCP, entering the data like shown. You’ll need to strip the “/site/wwwroot” off the end of the PublishUrl from above, and be careful with the user name, as it needs to be in the format “WebAppName \ deployment user name”.
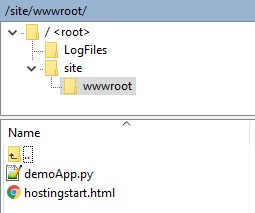
- Having hopefully connected OK, copy your site’s files across. Here you’ll see my finished product, a simple demoApp.py file in the wwwroot folder:
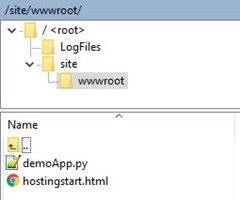
- Here’s the basic demoApp.py file I used, courtesy of the Flask documentation:
from flask import Flask app = Flask(__name__) @app.route('/') def hello_world(): return '<br><h1>Hello, World!</h1>' if __name__ == "__main__": app.run() - Back in the Azure Portal we need to customise the Startup command. You can do this by browsing to the App’s Settings / Application Settings / Runtime, and paste this into the “Startup File” field, making sure you replace “demoApp” below with the name of the python application file:
gunicorn --bind=0.0.0.0 --workers=4 --timeout 30 demoApp:app
Alternatively, you can just push it in via the Shell:
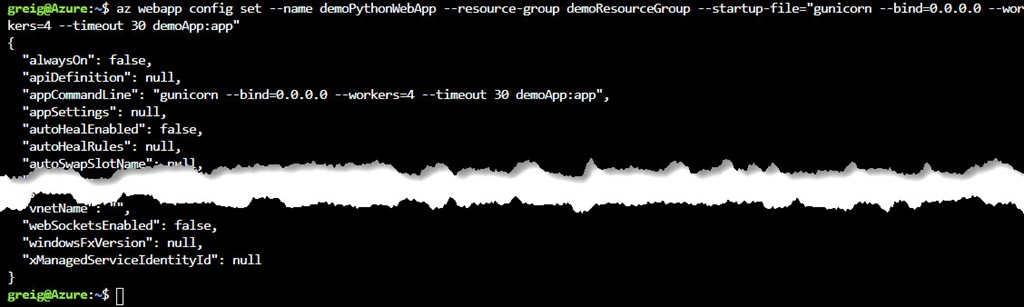
az webapp config set --name demoPythonWebApp --resource-group demoResourceGroup --startup-file="gunicorn --bind=0.0.0.0 --workers=4 --timeout 30 demoApp:app"
- Azure doesn’t pick up these changes automatically, so you’ll need to restart the WebApp. There’s also a button for this in the toolbar at the top of the Overview page.
az webapp restart --name demoPythonWebApp --resource-group demoResourceGroup

- Tada!


Credits / References
Azure-specific:
- Azure Service Plans
- Create a Python web app in Azure App Service on Linux (Preview)
- Configure your Python app for Azure App Service
- Create an App Service app and deploy files with FTP using Azure CLI
Python-specific:
Tools:
Revision History
8th February 2019: This is the initial post.
– G.


