I’ve been building electronic kits since I was a kid, and even designed a couple that made publication. A very relevant example of the latter is my Telephone Intercom. It’s been a long time between drinks though – and I’ve been lamenting that since 2011 apparently, if you read the aforementioned post. Ahh, fate…
Wind forward to 2018 and some friends of ours have fled overseas to build their dream home in rural New Zealand, off-grid and with no network connectivity.
Wisely or otherwise, we thought that a time-lapse movie of the building of said home would make a great housewarming present, and so a not inexpensive rig based on a GoPro was procured, tested, personally delivered to New Zealand and installed.
After its first images were received and processed, Rocky – the photographer in the family – decided he wasn’t happy with the video quality out of the GoPro, and that a DSLR would capture a better image. The only problem is that comparable rigs cost MANY thousands of dollars – and that’s before you add the camera and lens.
“We’re clever, surely we can just build one?”
At the core of any time-lapse rig is the controller – an “intervalometer” – but what all but the most expensive ones lack is the ability to configure a shooting schedule based on the time of day and day of week.
And so it is that the “Intervalometerator” came into being. It’s the intervalometer’s intervalometer, hence the convoluted name we were quick to abbreviate to “intvlm8r”.
At its heart are two micro-controller boards, each serving a specific purpose. An Arduino Pro Mini is the master, with a battery-backed external real-time clock signalling it to wake the camera and fire the shutter. These are the two critical components to the Intervalometerator. The Arduino normally spends its time asleep when it’s not triggering the camera to take photos, and while snoozing the entire rig pulls almost zero current from its battery power supply.
A Raspberry Pi Zero W provides a web-based “front-end” where all configuration and management takes place. An I2C bus between the micros handles the higher-level communication, while 3 digital IO lines between them provide ‘wake’ and ‘shutdown’ signalling. The digital IO reduces the risk of drive corruption as the power-hungry Pi’s power is applied and removed under the Arduino’s control – where the Pi’s left to sleep as much as possible. (In case you’re wondering, we couldn’t implement this in I2C as the Arduino’s only a slave – it’s unable to initiate a command).
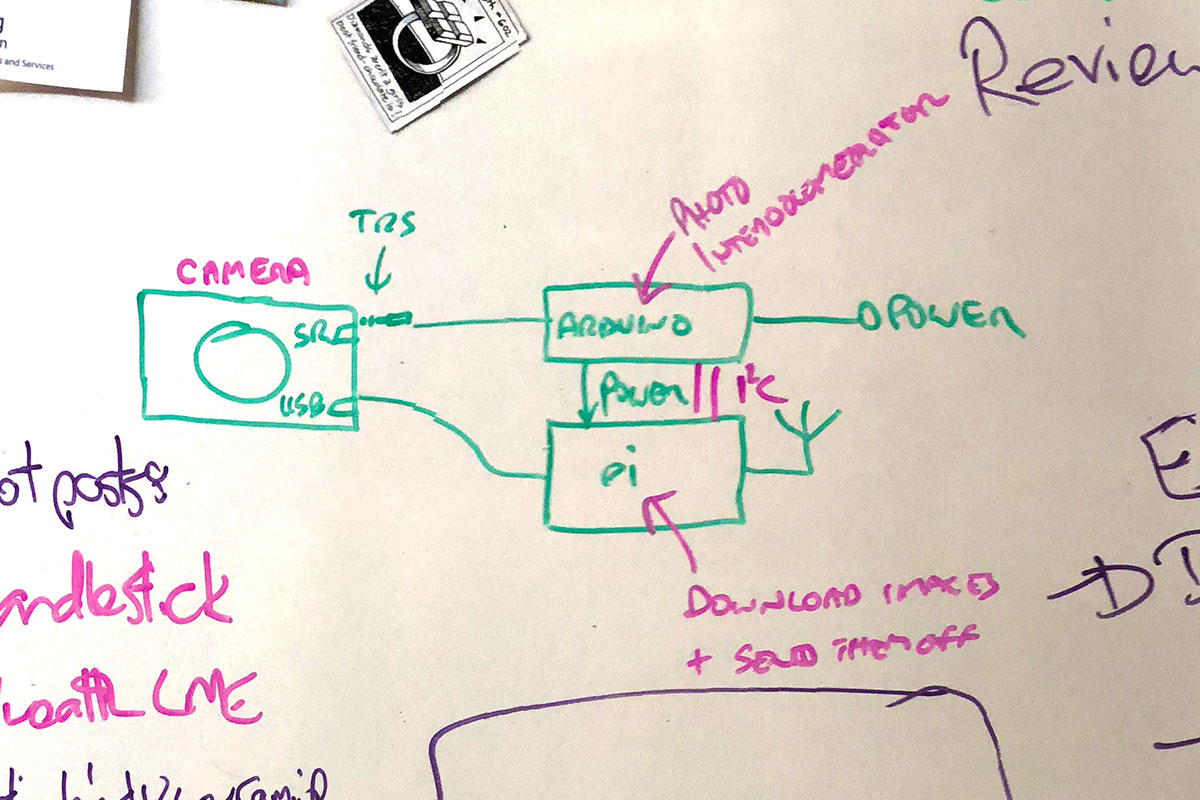
From this
This is the white-board concept drawing from early 2018:
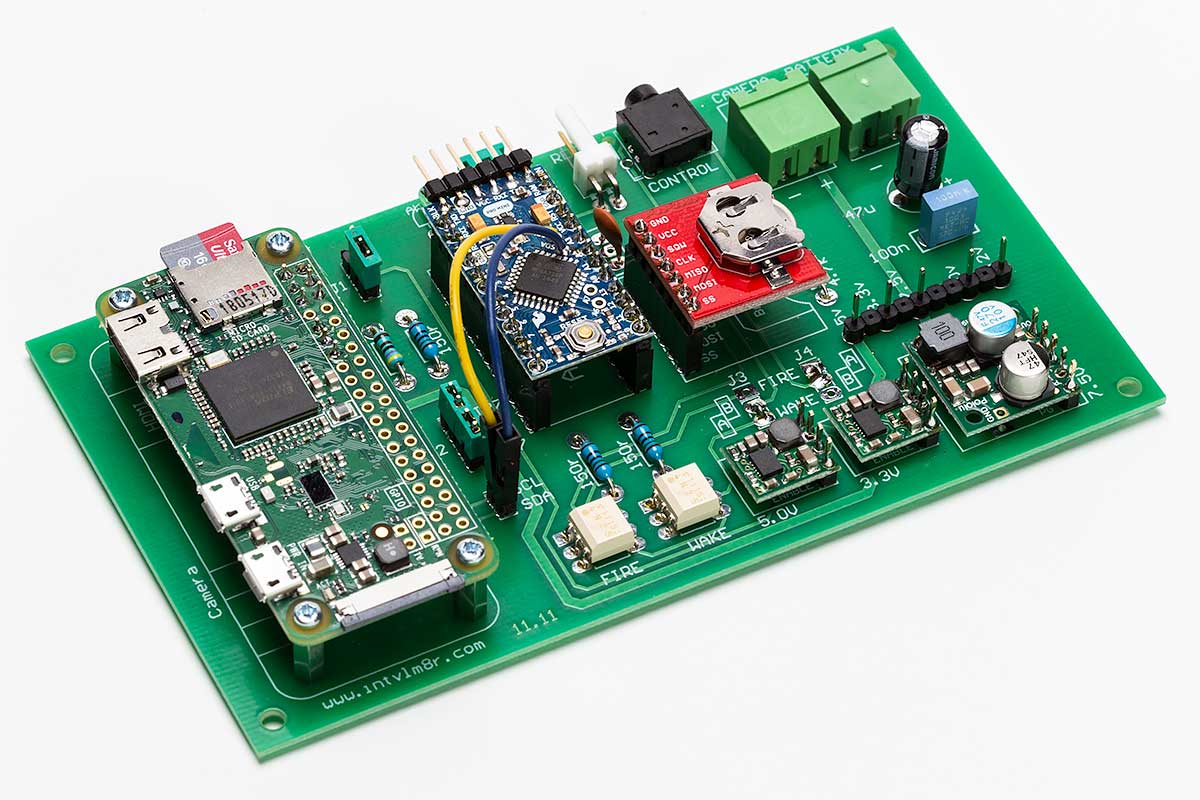
To this
TADA! An assembled controller:
Working demo site
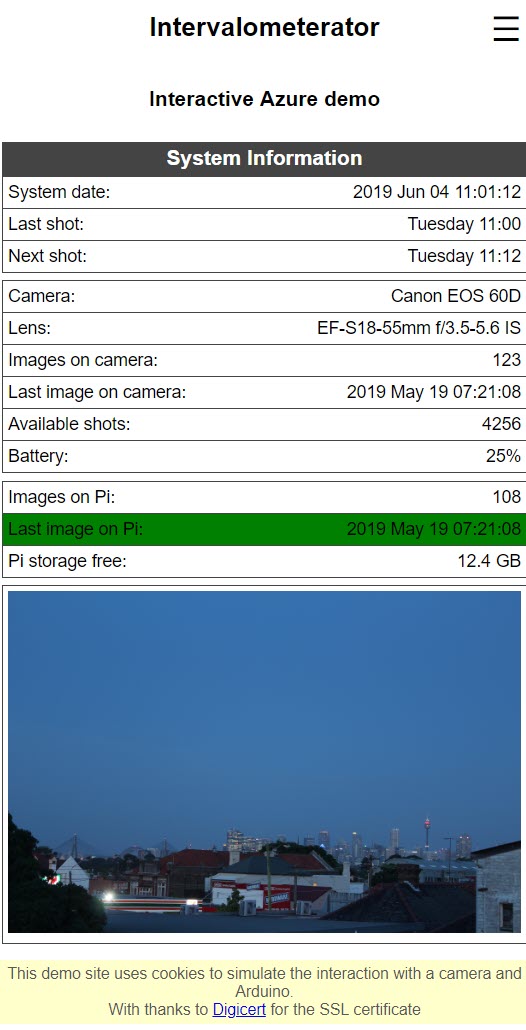
Take it for a test drive! In this demo version, the website is running as a Python application in Azure. It’s been modified a little for Azure and creates cookies on your machine to fake the interaction with a non-existent camera, but the end result is an otherwise true rendering of the site. The photos on the home and thumbnails pages are of the Sydney CBD, taken while the first unit was on our roof for testing in late 2018.
Snap-happy
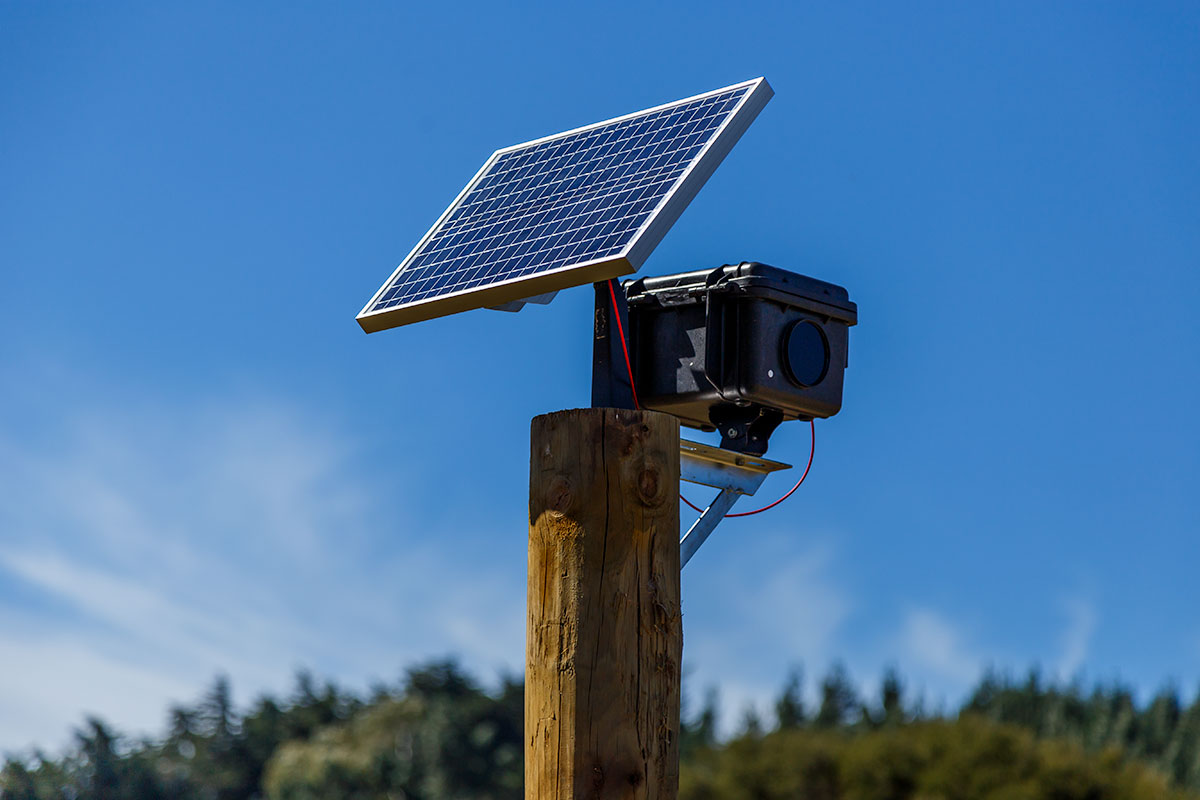
Our first production unit – as pictured atop its post, atop *this* post – has been running in New Zealand since January 2019.
Thankfully – from a product development perspective – it hasn’t been an entirely smooth ride. First the relatively new SD card died, but we were able to have that replaced by our mates on-site, saving us the emergency trip to NZ. The issue was documented and extra traps added in the code for this particular failure scenario. Reinstating the intvlm8r after memory card surgery then (eventually) revealed that the cable to the solar panel requires a bit of extra muscle to make a connection. Failing the application of said muscle means the battery won’t charge and will eventually go flat. Noted for next time.
Whilst it’s currently snapping 4 photos an hour for 12 hours a day, there’s not actually any movement on site beyond the odd grazing sheep. Delays with finance, architects and builders have reached Grand Designs (NZ) proportions, but we’re assured of some photo-worthy opportunities commencing #RealSoonNow.
It could yet be another year before this whole thing is wrapped up and we have a housewarming video to show for it, but we’re confident and remain enthusiastic.
Where to now?
- All the code is on Github along with the shopping list and detailed build instructions.
- The PCB is on eBay.
- … and for those who love a detailed “Making of“, that’s on the site’s Wiki, along with more text explaining the main design decisions.
Revision History
8th June 2019: This is the initial post.
13th June 2019: Corrected 2 accidental references to 2018 instead of 2019.
– Greig & Rocky.


Can this be used for Astro photography?
I honestly don’t know enough about the field to be sure, but my gut says probably not.
The intvlm8r doesn’t hold the shutter open, so if you’re taking long exposures then it’s definite no.
If you’re taking a lot of short shots over a long period of time, with the camera perhaps being repositioned by a motorised mount, then maybe – but only if it’s doing this unsupervised, night after night. If you’re on-site then a basic intervalometer is all you need.
But that’s not to say you don’t want one in your kit-bag anyway?? ;-)
– Greig.
(Thanks for asking).
Hey Greig
That’s a great setup using the pelican weatherproof case. Did you fabricate this case yourself?
I have built something similar (but seemingly less professional) used at Kart Tracks which have heavy rubber dust. Plus the mount it sits on, perfect for what I’m looking for.
Can you throw me a link or an explanation how you built the case and where the mount is sold?
Thanks
– Brendan
Hey Brendan,
You should find all you’re looking for in the docos over on Github. Check out the shopping list for the Manfrotto specifics, and the case assembly page for the manhandling of the Pelican.
– G.
Hi, very interested in this for a research project here in the UK, but can it be run totally “off grid” where there is no network etc. I.e. can I retrieve stored images and setup the device on site and not have to rely on Dropbox, Google Drive etc? My site is very remote! Many thanks.
Hi Huw,
That’s EXACTLY the setup the intvlm8r was originally designed for: an off-grid home build in the middle of nowhere, New Zealand. The solar cell/battery combo keeps it running, the daily audit routine copies the images from the camera to the Pi (adding redundancy to the image files), and then on a ~weekly (or whatever) basis, you pop by with a laptop, connect to the Pi’s Wi-Fi network and then download the photos from the Pi.
– Greig.
This is EXACTLY what I’ve been looking for… but I’m not handy in making electronics. Can I buy some off of you?
Hi Matt,
Absolutely! They’re available on eBay:
https://www.ebay.com.au/itm/266454263566
– Greig.