Uploading pre-produced audio recordings into Lync or Exchange can sometimes be a challenge. I’ve previously documented the audio file formats that Exchange and Lync require, and it’s relatively easy to reformat files with a digital audio editor like Adobe’s Audition or Goldwave.
There are however a few circumstances where this isn’t possible – like setting the greetings in an Exchange UM-enabled mailbox. At other times you might not have a network connection, and an over-the-phone method is your only option (e.g. using Exchange’s Telephone User Interface – the TUI – to change an auto-attendant’s greetings).
There are many ways of interfacing between your audio device and the phone lines. A not-uncommon kludge I’ve encountered in the field is to use a Music On Hold line isolation unit (LIU) in parallel with a phone, with the phone on handsfree and muted so that you can navigate the DTMF menus and hear that’s going on without any ambient or background noise leaking into the recording.
I’ve long had a soft-spot for my old ETI-734 “Landline interface”, but it requires an analog phone line, and they’re becoming harder to come by (and that’s probably a good thing!).
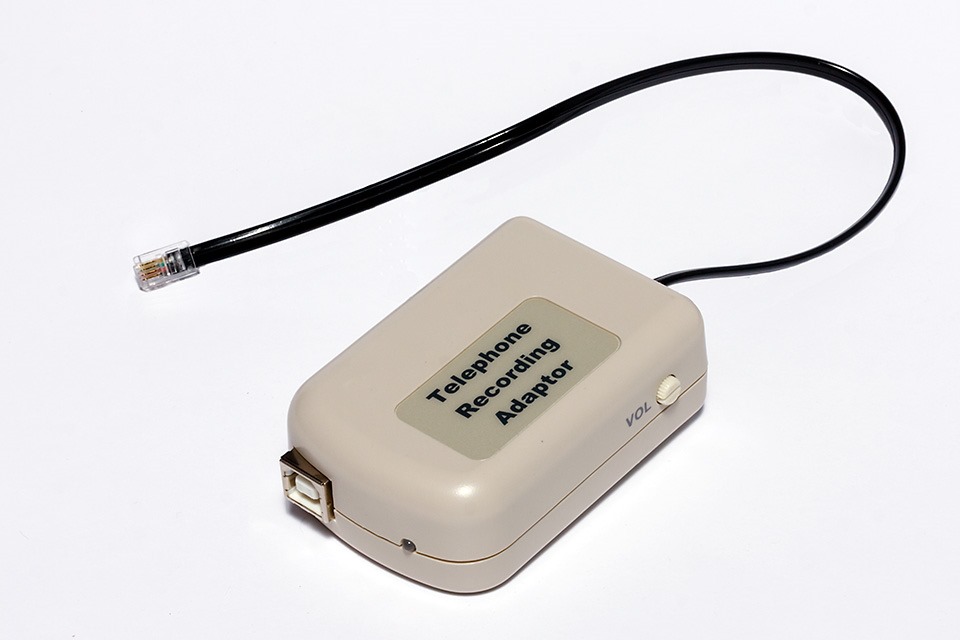
A colleague recently introduced me to the Trillium family of telephone recording adapters, and I splurged and invested in the “REC/A-ADPT-USB” you see pictured below.
From this… |
… to this! |
 |
 |
| The ETI-734, published in ETI Magazine, May 1983. | The Trillium “REC/A-ADPT-USB” |
The Adapter sits in series with the phone’s curly cord, with the stubby black cable going into the phone. In my tests, it worked flawlessly with a Polycom VVX500, a Snom 710 and even an old USB CX300.
How-To
The setup isn’t particularly complex.
- Plug it in to a spare USB port on your computer. On my windows 8 PC it installed without needing any manual intervention. The downside of this however is that it installs itself as a generic sound device, and you may have problems trying to figure out which one it is later!
- Unplug the curly cord from the phone and plug the Adapter’s short lead into the phone
- Now plug the curly cord from the handset into the socket in the adapter
- The small LED on the end of the adapter should now be flashing. If it’s RED, change the selector switch on the side to its other position. The LED should now be flashing green/orange
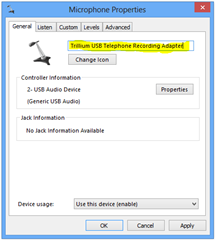
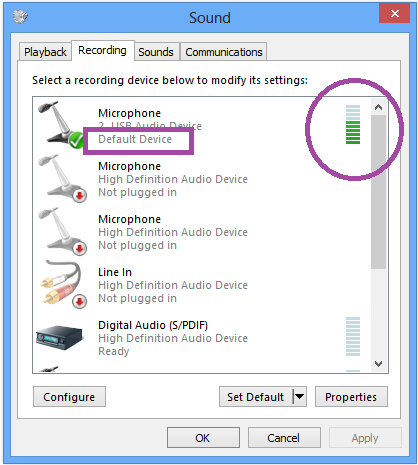
- Now we need to establish some audio paths. Launch Control Panel / Sound and select the Recording tab
- Now we need to find the device that corresponds with the audio coming from the phone line. In my setup it is the first Microphone in the list – and it’s also now the Default Device, so that might make it a bit easier to find. To confirm this, pick the handset up out of the cradle and say Hi – your voice should register on the bar-graph / VU meter on the right-hand side

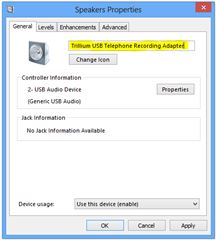
- Highlight the Microphone and click Properties. From the general tab, give it a more meaningful name than just “Microphone”:
- On the Listen tab, check “Listen to this device”, and for “playback through this device”, choose your headphones or PC speakers. It’s this “playback device” that we’re going to be listening to the phone call through. (We can’t use the phone’s handset to listen because we can’t mute the microphone)
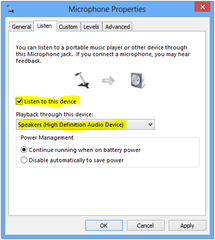
- If you’ve clicked Apply by now, you may start to hear feedback – it’s the sound from the phone’s handset being relayed to your PC. So now unplug the handset from the Adapter – we don’t need it any more – but leave it sitting in the cradle for the time being.
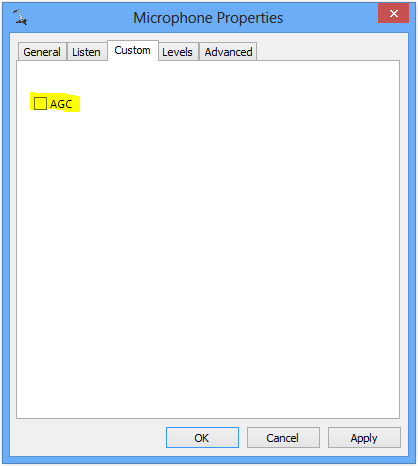
- On the Custom tab, clear the AGC box, and click OK. We’re done here for now

- If you lift the telephone handset from the cradle, you’ll now hear dial tone through your speakers. OK, we’re almost there – now we just need to sort out playback
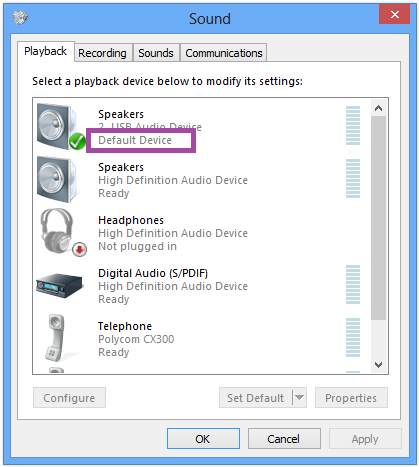
- Control Panel / Sound should still be on screen. Select the Playback tab. As before, the new device has been set as your Default, which makes it a little easier to find
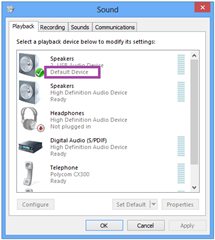
- Highlight the “Speakers” and click Properties. From the general tab, give it a more meaningful name than just “Speakers” and click OK
- If you’re confused as to which sound device is which, don’t fall for the trap of selecting Configure / Test. Anything you play out the “speakers” of the Adapter will be picked up by its “microphone” and relayed to the speakers you selected in step 8 – and of course if you’ve selected what turns out to be your speakers for the same test, the audio will come from the same place. I found the device’s Properties / Controller Information Properties / Events tab showed the date I installed the device, which might help you untangle a mess of sound devices
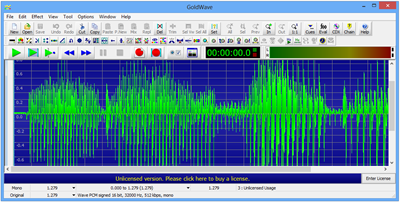
- OK, it’s showtime. Let’s take it for a test. Launch your preferred media player and open the greeting or announcement file you want to transfer to Exchange (or where-ever). I clicked Play and heard the sound come out my PC speakers, as expected
- Lift the handset from the cradle, make a test call to someone and play the recording to them. Don’t forget though that you have no active microphone, so they won’t be able to hear you! (By all means, plug the handset back in to the Adapter for this step if you wish)
- Tweak the volume as appropriate in the tray app, or in your media player app. (The volume control on the Adapter controls the audio level from the telephone handset fed to the USB “microphone” in a scenario where you might be recording a call, so it’s not relevant to us here)
- Once you’re happy that the levels are right, you’re good to go. Call into your Exchange Auto-Attendant and follow the TUI prompts, login to Exchange and customise your own greetings, or login to your mailbox through the Voicemail tab in Outlook and have Exchange call you…
- One final word of advice: CHECK the message after you’ve recorded it! Dial in externally as anyone else will and follow any Auto-Attendant navigation. You want the levels to be consistent, without distortion or clipping, and you want to ensure you’ve not accidentally left too much silence or cut the recording off mid-sente


Compatibility
Trillium says the Adapter is compatible with “most telephones fitted with a modular handset cord”. I tested it with a Polycom VVX500, a Snom 710 and even an old USB CX300 and all worked flawlessly. If you’re at all worried, check their Compatibility Guide. I also found that the Headset port on my phones worked just as well, and in most cases wasn’t as hard to access.
I sourced my adapter direct from Trillium in Melbourne, Australia, and it set me back AU$187 delivered, including GST. It carries the Aussie “A-tick” compliance mark, as well as CE certification for other markets.
With thanks to Damo for the tip-off, and as always, ozRocky for the glossies.
– G.


For someone who frequently participates in online meetings, TunesKit Audio Capture is the perfect tool to solve recording problems. The sound of recording meetings such as Zoom and Teams is crystal clear, so you no longer have to worry about missing any important discussions. I think it’s really cool and it can be saved to different audio formats.