
Whilst still on a high having passed the “Produce [Chocolate] Showpiece” unit of my Patisserie course at Hamilton (NSW, AU) TAFE, a friend randomly linked me to a video of a cute Dalek made of cake.
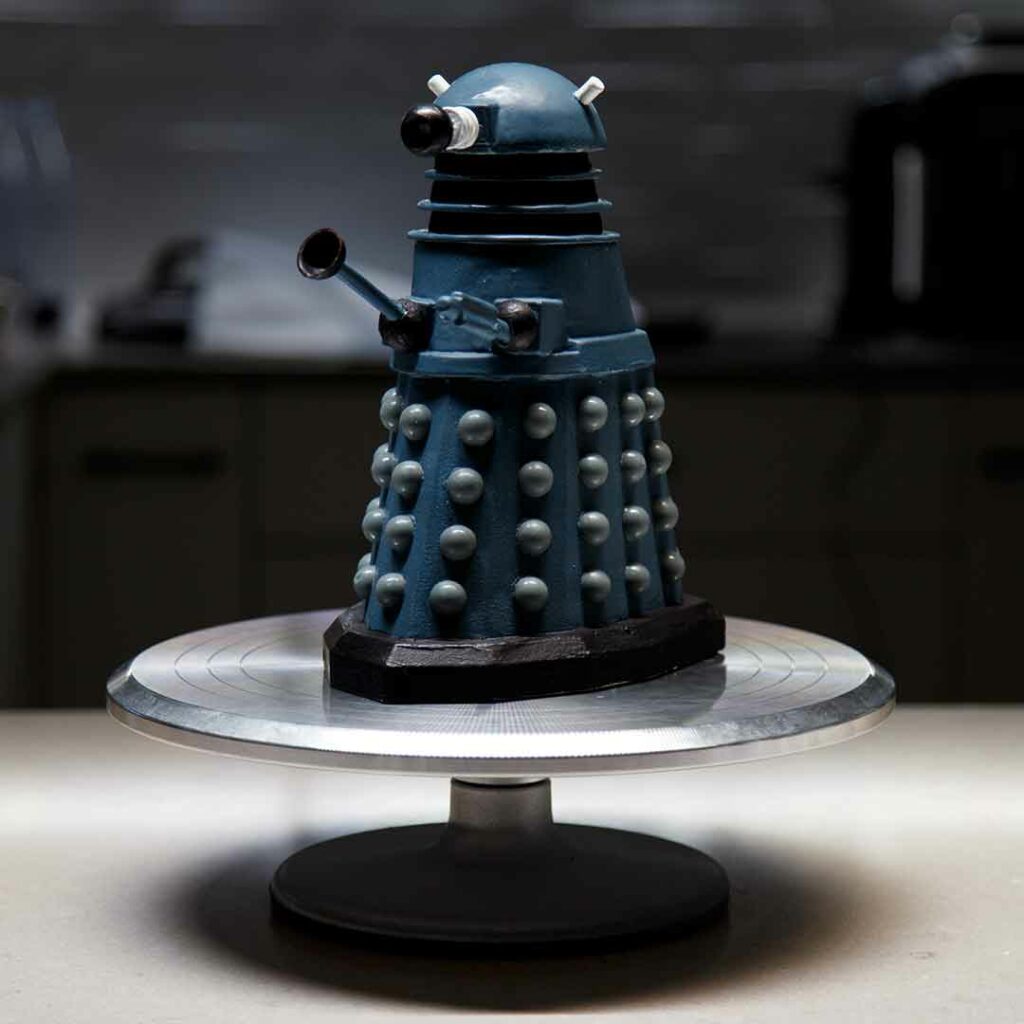
Inspiration possessed me, and a couple of weeks later we have a chocolate Dalek – “Derek”.
If you possess the usual chocolate-making tools and equipment, you can make one too! The process is made a lot easier with the 3D-printed mould set designed by my partner Rocky, which you can download from Printables. He derived this from an original CAD drawing at GrabCad.
The mould isn’t a complete kit, but delivers the three main components: the “skirt” (base), the “shoulders”, and the dome. If you happen to have a 70mm semi-spherical mould (e.g. CW2253) you can skip the third print job. A fourth piece is provided as a template to help you place the sense globes equally around the skirt. (In this post I’m using Dalek terminology from this Wikipedia page.)
Scaling / sizing
Our Derek stands approximately 23cm (9″) tall and weighs 960g (2.1lbs), taller – and more chocolate – than I had initially anticipated. He came out that size purely because the smallest mould I had for the FIFTY-SIX sense globes around the skirt were 14mm. That drove the rest of the scale to reach the Dalek we ended up with.
Rocky’s made the design so it’ll scale, allowing you to print it whatever size you require. If you happen to have a 10mm hemisphere mould, your malevolent chocolate invader should be around 15cm tall.
If you want to try your own maths, the original Daleks stood 5’1″ (1550mm) with 4+1/8″ (105mm) sense globes, so the globe diameter was 6.77% of the height. Converting to metric and scale, divide your sense globe diameter by 0.0677 to determine an approximate height. (10 / 0.0677 = 148mm.)
Construction
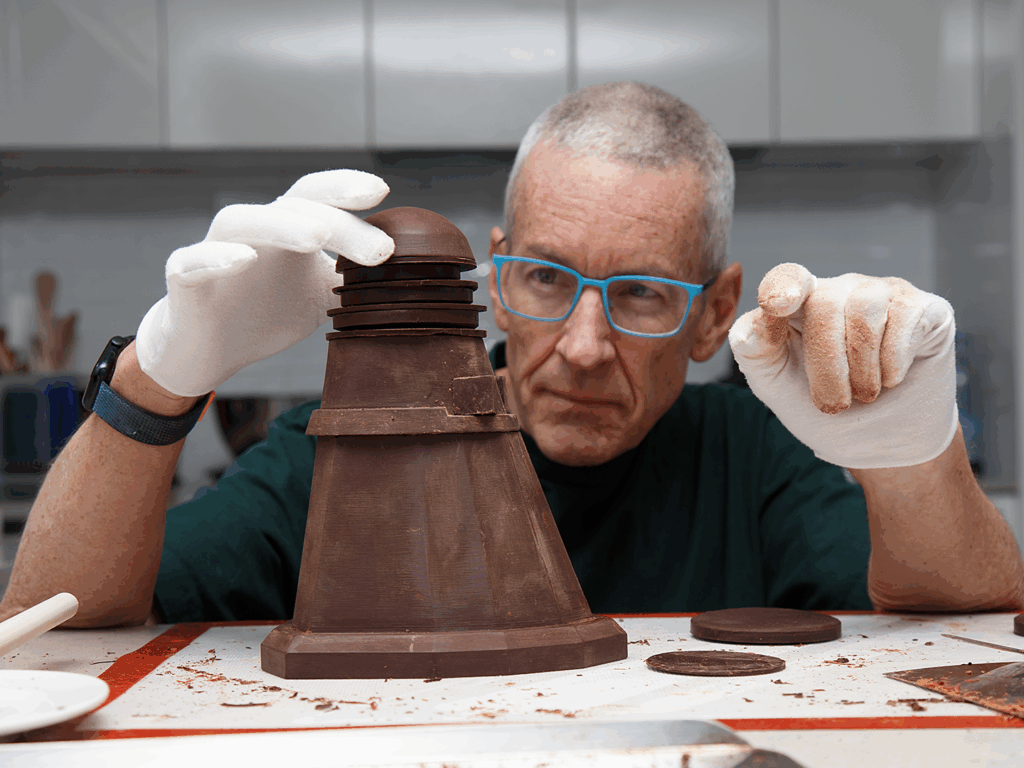
Here’s how I made him, from the bottom up.
I made each major piece separately, with the final assembly process documented further below.
Base
The base was cast using the 3D-printed mould, with two coats of well-tempered Callebaut 70% dark, then polished to remove the join and layer-marks from the mould.
Sense Globes
The sense globes are a 14mm diameter semi-spherical mould from Brazilian BWB, which I picked up locally from Cakers Paradise on the Gold Coast, near Brisbane, AU. Turns out it’s not dishawasher-safe. Whoops. (I predict a CW1797 in my future!)
The sense globes were cast in Callebaut W2 (white) tinted blue-grey with Savour’s blue and black oil-based colour powders.
Shoulders
The shoulder section was cast in the second piece of the 3D-printed mould set. Two cubes of approximately 2cm were then hand-cast, polished, and inset in the shoulder to become the gun and plunger arm mounts. I just used a fine-tipped sharp knife to make and then enlarge the holes, and a tiny Loyal palette knife to apply the molten chocolate cementing them in place and filling in the gaps.

Neck
The neck was more fiddly, requiring multiple cast components 3mm and 10mm thick. I cast them on the bench just using my custom stainless steel rods for the height, and punched the circles from my round cookie cutter set. (Savour’s plastic frames would do the job too.)
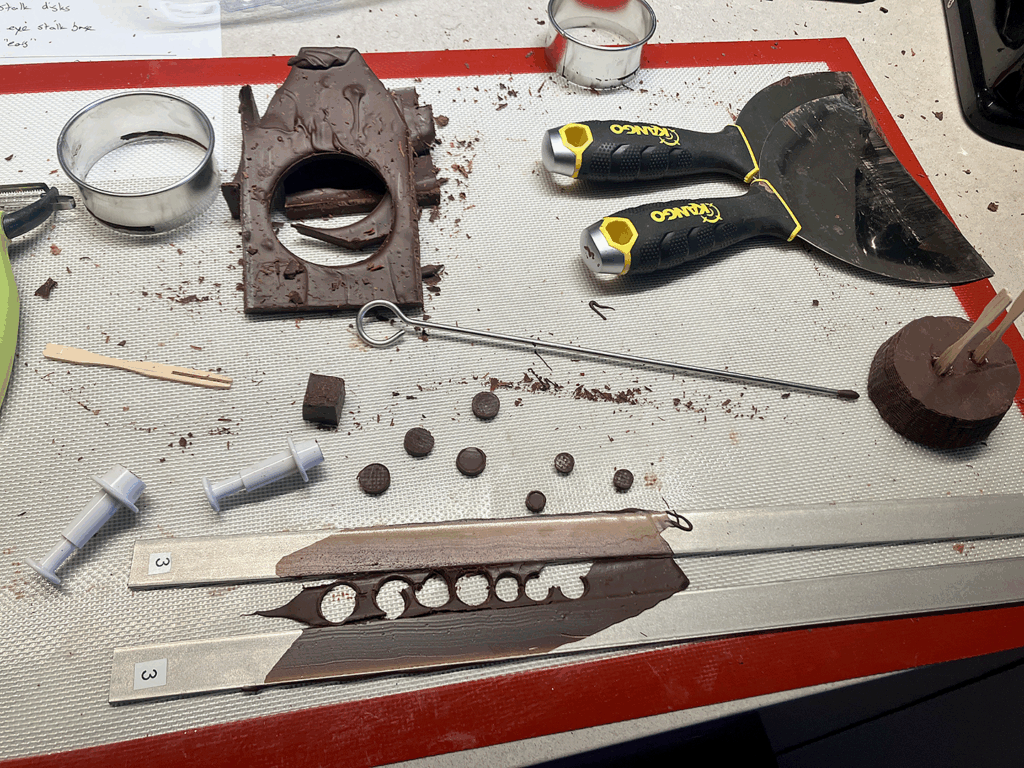
For the thicker pieces I cut out two the same size and the third one (the top layer) a size smaller. I stacked all three on top of each other, pierced them top down with a HOT metal cake skewer, then wedged a bamboo party fork in the still-wet hole to hold them in one piece while I shaved them roughly conical using my vegetable peeler and a small but nasty metal brush from Bunnings. Once complete I removed the fork and twisted sideways to separate them again. These pieces were hand-painted with the same black cocoa butter that’s on the fender.
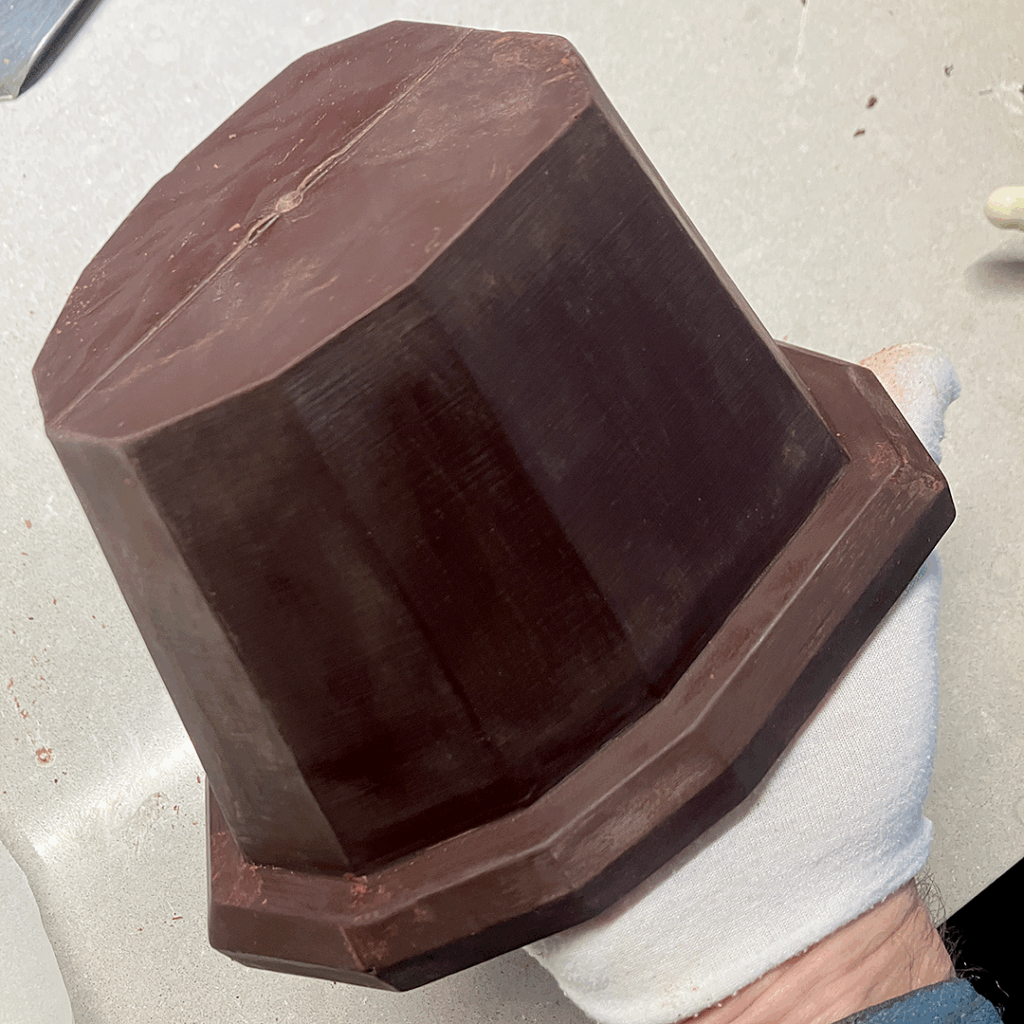
Dome
I cast the dome using the 3D prints, but at this scale a CW2253 would also work. As with the other castings I gave this two layers.
I chocolate-glued a matching 3mm-thick disk to the under-side which will later allow it to sit comfortably on top of the neck.
Another small cube of chocolate was inset to become the eye stalk mount.
For this build I wanted to be able to rotate the dome, so I carefully drilled an axle hole as close I could to the centre of this, then into this glued a piece of the chocolate rod leftover from the eye stalk and arms (described next).
The dome lights were added in final assembly.
Weaponry
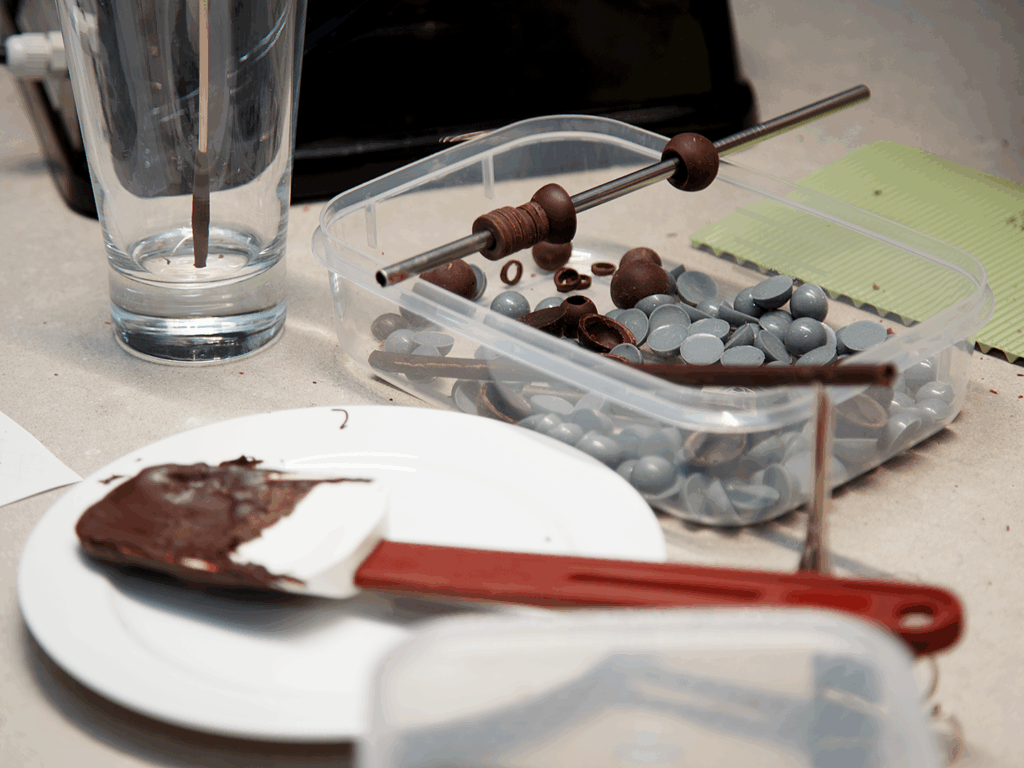
The plunger is a 20mm semi-sphere (CW1495) that I carefully shelled with two layers and used the back of a Zylis corn holder (seriously!) to make sure the inside was devoid of lumps and uneven edges. (I went madly scratching around for something that had a rounded end that fit, and they did the trick! The back of a wooden spoon would have worked too.)
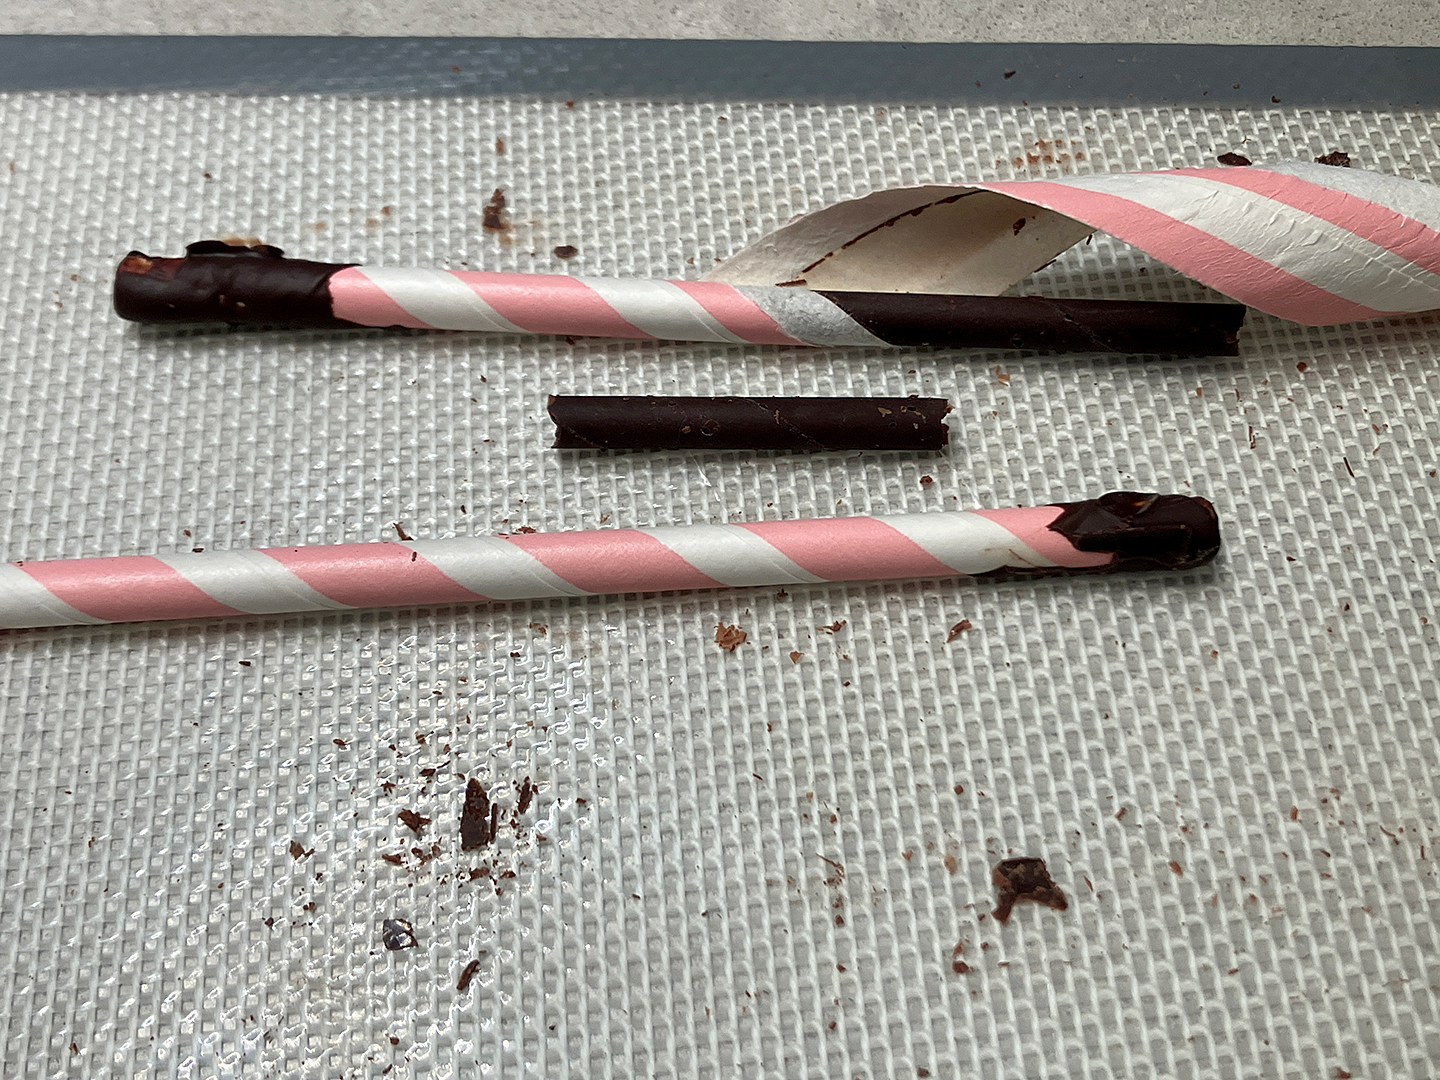
The arm shafts for the gun, plunger, eye stalk & the dome lights were cast using a silicone straw from Coles supermarkets in AU. While I was there I also bought some stainless steel ones. Around those I wrapped some baking paper and taped them up, then removed the straws to make a mould.
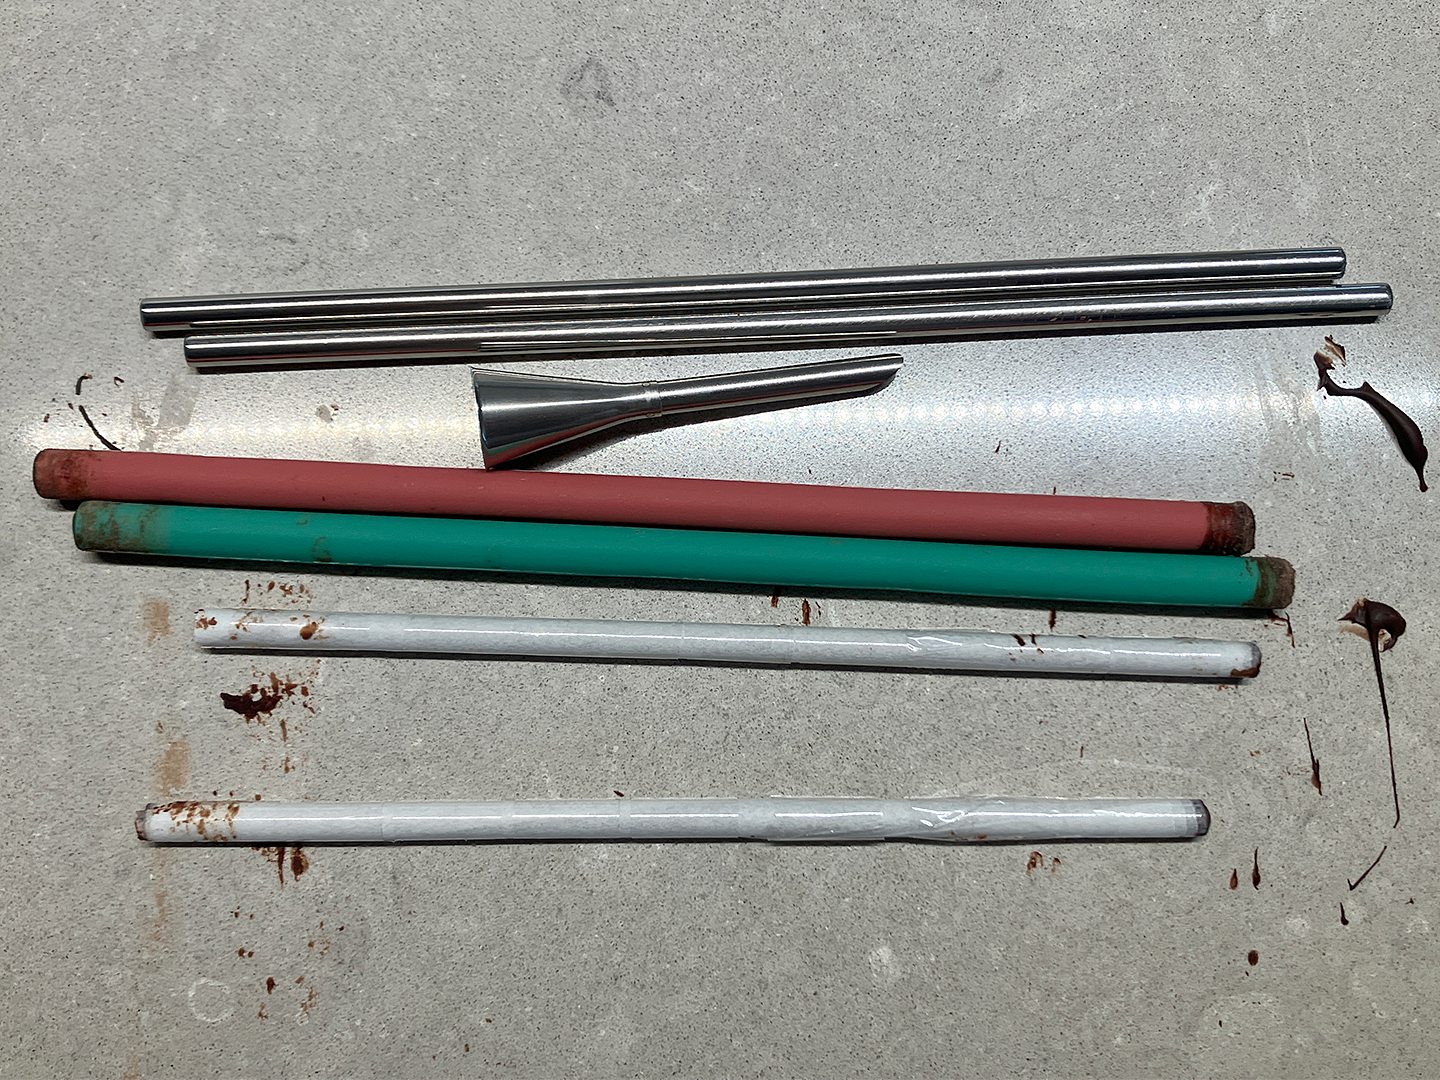
I piped chocolate into both straw forms using a Loyal 230 piping nozzle, again from Caker’s Paradise.
Once set, the paper-based forms were easily unwrapped from their contents by slicing with a sharp box knife. Unfortunately that same destructive technique turned out to be necessary for the silicone ones, where I had optimistically hoped that the application of some heat/cold/muscle would have let me simply push them out. On a future attempt I might try pre-oiling the (replacement) silicon straws.
Another trick you can employ is casting directly inside paper straws, then – carefully – unwind the paper.
The gun’s a bit clunky, and was made by gluing three pieces of half-cylindrical chocolate rods to the side of a longer cylinder. The half cylinders were cast in a silicone sushi roll mat, a random inspiration at Coles.
Eyeball
For the eyeball I hedged my bets, casting multiples of solid 14mm and 20mm semi-spheres, then chocolate gluing them together. (I wasn’t sure which would be the best fit for the scale, and in the end I went with the 20mm.) For the recessed front of the eyeball I first cut a slice off with my knife, then carefully added an indent by hand. I then enlarged and followed this line with a steel drill bit all the way through to make the mounting hole for the eye stalk. The white eyeball was hand-painted later, and is in fact the very end of the eye stalk.
Final Assembly
The final assembly process was rather nerve-wracking. I don’t know how I didn’t pass out from holding my breath for extended periods!
The process went like this:
- After a final polish I used melted chocolate to glue the shoulders to the base.
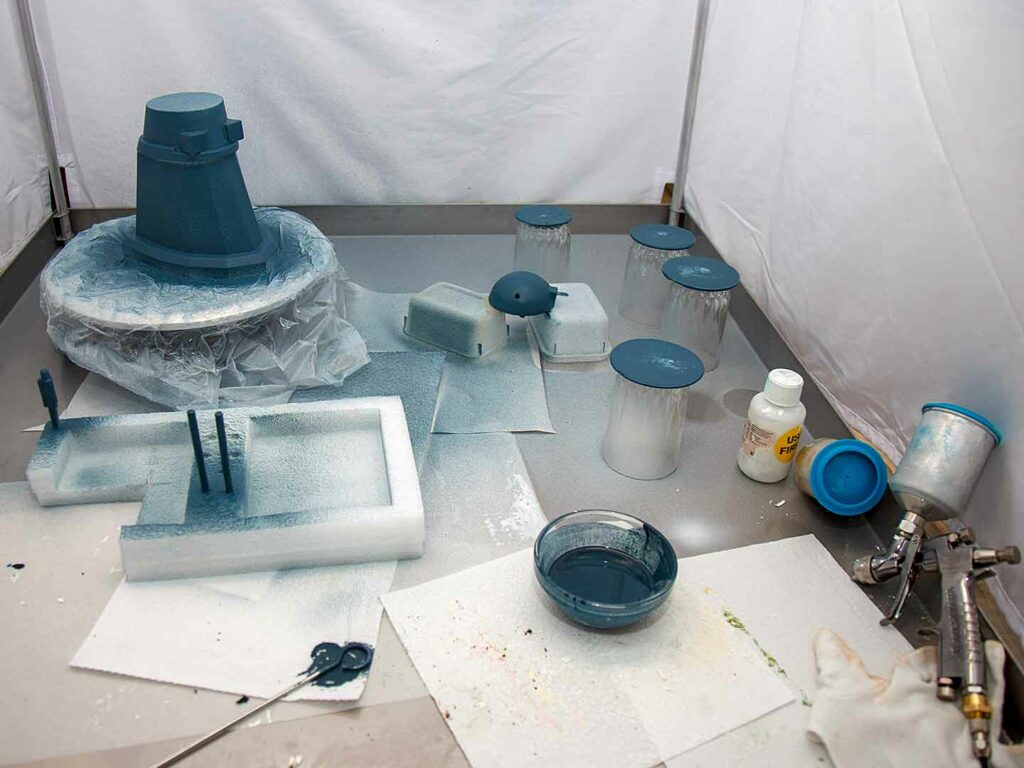
- All pieces except those that will be black were given a base coat of white. (I don’t know if this was entirely necessary, but it ensured any colour I later added wouldn’t be diminished by darkness behind it.)
- Once that was dry, the base, shoulders, neck and dome were sprayed a custom blue-grey. I made plenty of this colour and kept the pot after, which I used to glue the sense globes on, and for the inevitable touch-ups.
- I hand-painted the fender with black CCB because I was worried about damaging the grey layer had I needed to mask it before using the spray gun. Seeing as I had the brushes out – and am allergic to washing up – I also painted the thick neck rings, the ball joints that would go on the shoulder’s appendage boxes, the plunger and eyeball.
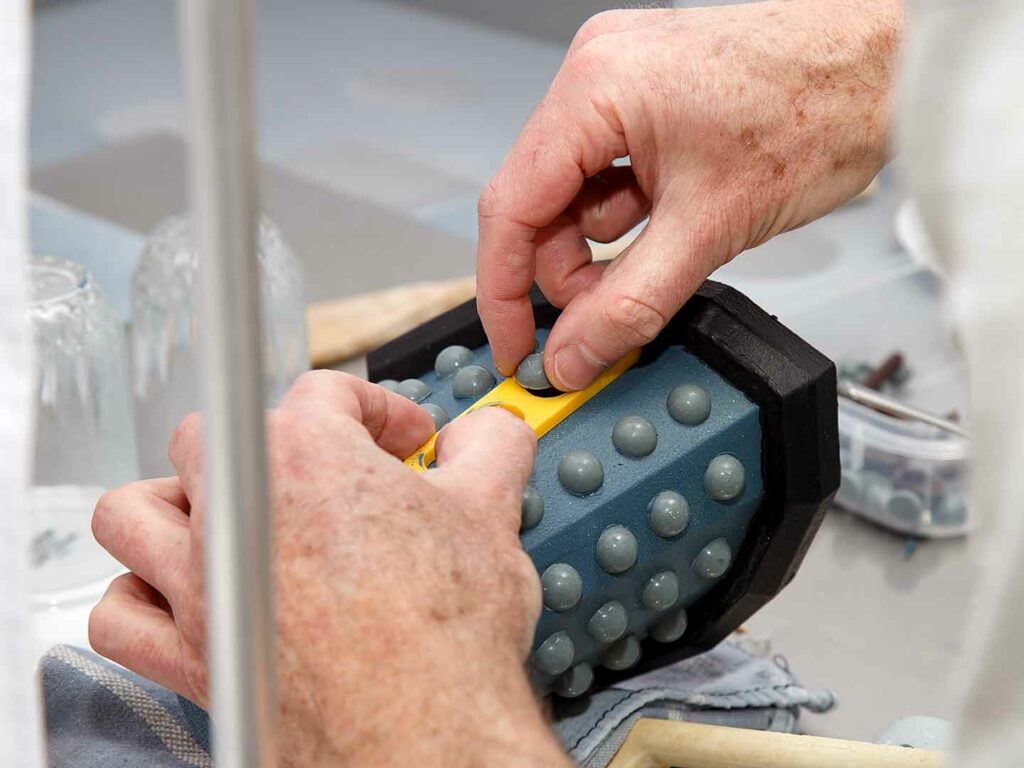
- Carefully laying Derek on his back and then sides, resting on a folded tea-towel I added the sense globes. These were all glued with the remaining grey cocoa butter and the 3D-printed mounting template. Where excess ‘glue’ leaked out, that was brushed away or blended with the body using a small paintbrush. The rear four layers (where Derek would have been awkwardly face down in the tea-towel) I managed by holding him airborne, one hand inside the hollow skirt, resting the template on the now level and horizontal surface, and applying glue and sense globe with my other hand.
- Once everything had dried I sat him back upright and added the six neck rings. With those in place I measured and drilled a hole in the top to accommodate the dome axle.
- Holes were drilled in the dome for the dome lights and some short white rods glued in place, whilst a hole was drilled in the centre of the mount for its eye stalk, cemented in place next.
- The final pieces were the weaponry, which started with gluing the solid black 20mm semi-spheres to the shoulder appendage boxes, then carefully drilling to accommodate the shafts of the plunger and gun. A black touch-up was necessary on the inside of the plunger to cover the blue colour from the glue and shaft.
TADA!
What I’d do different next time
- The 3D-printed dome had notches to mark for drilling/mounting the dome lights and eye stalk assembly, but they didn’t come out in the finished product. If there’s a Mk-II they’ll be more prominent, ensuring the dome lights are the same height and equally spaced from the stalk.
- A 3D-printed eyeball with the eye lens recessed would be a nice addition. To the back of it could just be glued a solid hemisphere of the appropriate diameter.
- I’d cast the eyeball & plunger in black chocolate, rather than trying to paint them in black cocoa butter.
- The gun needs to be done differently.
FAQs
Is it chocolate?
It’s 100% Callebaut chocolate!
The bulk of it is 70% dark (“70-30-38“), and the sense globes are W2 white.
If you want to get technical, the coloured pigments aren’t chocolate. The sense globes have oil-based powdered colours FCF/E133 & E172 mixed with the W2, the black pieces were hand-painted in coloured cocoa butter with 10% E151, and the remaining bits of the body were sprayed in a mix of white (titanium dioxide, E171), blue (E151 ) and black (E133) cocoa butter. (If I’d had a lighter blue the E171 could have been avoided – or you just end up with a darker, more macabre Dalek.)
But it’s as chocolate as chocolate gets.
Is it edible?
Totally, although I’d recommend against eating it all in the one sitting.
From a hygiene perspective it was made in a domestic kitchen in a house where cats live. As such I would not be permitted (here in NSW, AU) to produce food for resale, but I cleaned the bench and equipment between each production session to ensure the end result is as sanitary as it would have been in a more compliant environment.
Is it solid?
No, it’s not solid. It consists of three separate hollow chambers, dome, shoulders and base/skirt. Those could easily have been filled with additives like cake, mousse, caramel, or rattly things like smarties/M&Ms, etc. Ooh: or a gelatinous green octopus-like thing??
Can you make me one?
I honestly don’t think you can afford it. There are a LOT of hours work in this monster. The $50 of chocolate (at trade prices) starts to look insignificant when you add in the labour.
References
- A glossary of Dalek terms: https://en.wikipedia.org/wiki/Dalek_variants
- The original CAD artwork from which the moulds were derived.
- Rocky’s mould set on Printables.
Credits
- Terry Nation for conceiving these legendary monsters in the first place!
- “Whom’n’stve?” on grabcad.com for the original CAD artwork from which the moulds were derived.
- Dean Gibson, Lennert de Visser & everyone at Hamilton TAFE for 3+ years of awesome tutoring.
- My ever-supportive, untiring partner Rocky for the decades of indulgence, the 3D prints, and all the good photos here.
Revision History
8th July 2025. This is the initial publication.
– Greig.


